
9 Easy Home Décor Upgrades That Cost Less Than $25
I’ve been thinking a lot, in the past couple weeks, about how to improve and take more care of the space I live in. I moved into my current apartment about seven months ago (time flies!), and it’s gotten to the point where we’re settled, and able to slowly start adjusting things more and more intentionally. When you first move into a place — especially if, like us, you double the amount of space you live in and therefore need to fill overnight — there is definitely a period of “whatever, get it done with what we have, and we’ll figure it out later.” First places, and the first few months in any new place, tend to have a random quality that is a suggestion of what you’d like things to look like, but which bends to the constraints of time, money, and logistics.
But once you’re settled, you can start thinking more in terms of what you want, what you got right the first time, and what you’d like to get rid of. The TFD office (which takes up our bottom floor), for example, is pretty damn good in its initial iteration, but as time has started to pass and we’ve worked in it for several months, stands to be changed a bit. Lauren and I are going to work on redoing a few corners, maybe swapping out a piece of furniture, DIY-ing a new table, and generally making the space a bit warmer. And in the upstairs, where Marc and I live, there are definitely a few things that are going to be improved or redone over the next few months.
And most important in all of these changes are the considerations of: what can be improved with little effort, what can be built ourselves, and what can we buy at a low price and improve to our taste? For example, we have a piece of furniture we’d like to add (a high-top table by the entryway for things like keys and mail), and for that, we plan on buying a cheap-but-decent, metal-legged table, and then redoing the top in a nice white tile. And in the past month or so, I’ve been going around to little corners of what we already have and swapping in or out a couple key things to make things feel warmer and richer, always keeping a tight budget wherever possible.
To that end, these are the 9 biggest things I’ve done/rules I go by which, for under $25 each, lead to a much more beautiful home overall.
1. Paint & Contact Paper

I have probably mentioned this a few times before, but it always bears repeating: particularly if you’re renting your place, learning how to do basic sanding & painting, as well as use contact paper, are going to be the two things you should master above all else. You literally change whatever you want, including things like cabinetry/doors/fixtures, which are often horrible and un-changeable as a renter. For example, the upper cabinets in this photo were originally a truly heinous mayonnaise color, which, aside from just being visually offensive on their own, didn’t match the black cabinetry on the bottom in the least.
The answer? $22 worth of contact paper in the same color/texture as the bottom cabinets, bought on Amazon, and now I have (relatively) chic, matching cabinets! And my landlord can’t punish me for fucking up the apartment! (Also, as a side note, that wine thing was also painted white with gold accents — it was originally dark brown. I white-washed pretty much all my furniture shortly before moving, because nothing makes a small NYC apartment look even smaller than a bunch of dark, heavy furniture everywhere.)
2. Differently-Colored Doors
As you’ll see in some of these photos, the next step (above the tried-and-true accent wall) is the differently-painted door. For example, I have a few charcoal doors in my upstairs, against the light-grey walls. And the tiny quantity of paint, usually a pint, required to do a little wall in one room and a few doors in other rooms, usually won’t run you over $17 bucks.
3. Little Plants In Creative Containers
I used to fear plants with my whole being, because I have always had the Midas touch for killing things, even cacti. But after a year with a (healthy, thriving) dog in my care, I figured I’d probably matured enough to try again with plants. Now, I have a total of about six potted plants in my house, most of which cost me 4-5 dollars at my grocery store or the Home Depot.
Then the question just becomes what to put them in, and I’ve found that the best solutions are things you’re already using, but which are cute in their own right: metal tea containers, cute little jam jars, empty candles, etc. Some will require a hole for drainage, but I have several plants that don’t drain and are doing just fine (including the above-pictured one on my kitchen cart, which is potted in a Number Six Depot tea box). My next move is going to be one of these tiny little mini palm tree-type things (!!) they sell at my grocery store for $16, to put on my bar cart. I just have to finish using the oversized candle whose jar I’m going to re-use for the pot. I can’t wait!
4. Discount Candles
If it’s not clear enough by now, one of the keys to upgrading your home is to get on your TJ Maxx/Marshalls/Home Goods candle game. I take a once-per-quarter trip to these stores and stock up on all manner of candles, always setting a budget of about $25, for which I usually get 6-7 candles, to last me for the next few months (and then be reused for everything to hold everything from pens to q-tips to flowers). I also sometimes buy wax and wicks (a few bucks for several candles’ worth) to re-fill my absolute favorite ones.
5. Gallery Walls
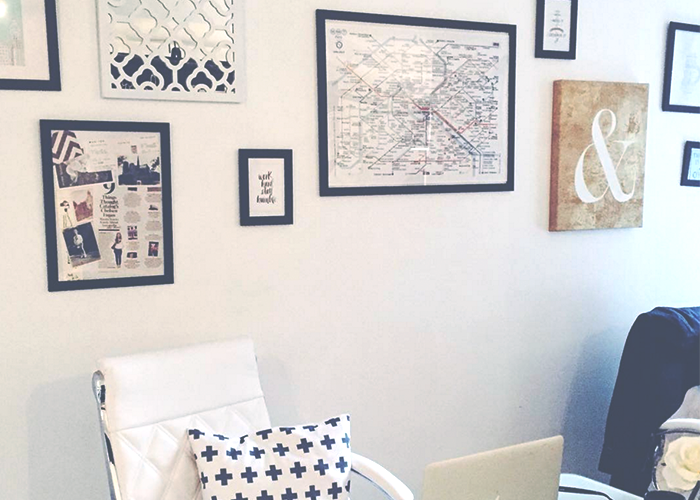

I love a good gallery wall, always. It takes up a lot of otherwise-boring space, it provides a home for all your random photos and clippings, and it immediately makes a wall look thoughtful, instead of haphazard. And my rules for gallery walls are pretty simple: stock up on some of those IKEA frames in a couple different sizes (the smaller ones are a few dollars for a pack of four!), fill it with everything from beloved family photos to postcards you get at the thrift store, and scatter in a few non-photo things, like mirrors, or this weird rose thing I got for $9 on clearance at a Target and painted charcoal.
Basically, as long as your frames are all the same color/thickness, you can put whatever you want in them and it will look cohesive. And if, like in the first gallery wall, you want to scatter in a few extra colors, keeping it neutral is always a good move. We added white and gold, and made sure to balance one on each side, and it didn’t conflict with the black at all.
6. Framed Magazine Cutouts
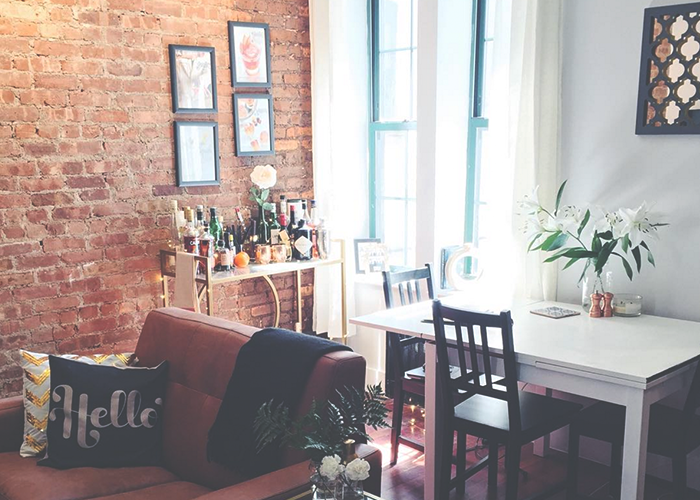
Get a subscription to one beautifully-designed magazine that you’ll actually read (mine is Bon Appétit, for $12 a year). Suddenly, you have an infinitely-renewable source of pretty things to cut out and frame. Above my bar cart, I have four full-page cocktail recipes that are actually functional, as well as being really nice to look at. And whenever I get bored of them, I can open up a back issue or two and fill them with some other, beautiful thing.
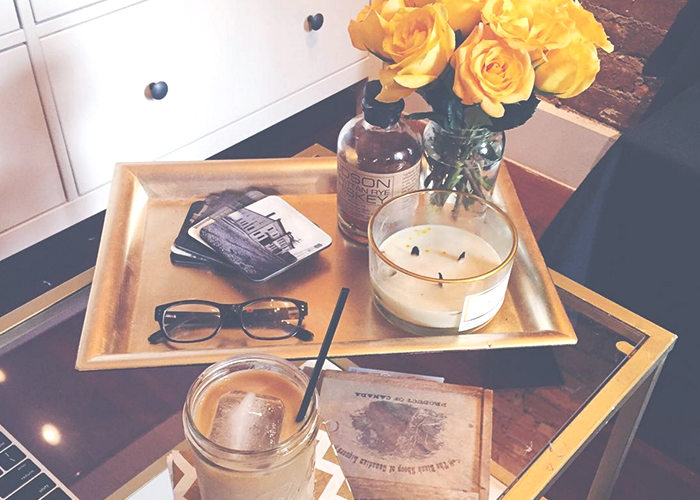
7. Thrift Shop Boxes
Pretty much all of my boxes (like the one in the first image, for example) come from thrift stores. Go to thrift stores and flea markets one weekend, and just look for boxes to store all of your little odds and ends. I’ve never paid more than $5 for one of my wooden thrift store boxes, and they’re extremely functional in addition to being adorable.
8. Dark Paint & Fairy Lights
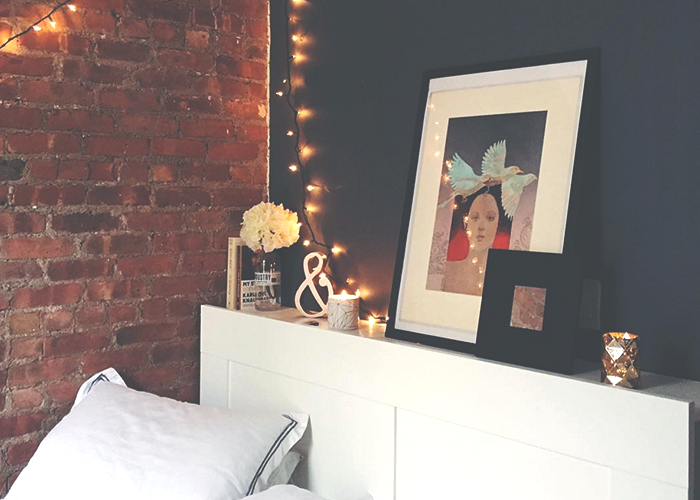
I have the regular Christmas light-style string lights, as well as the finer, LED-on-copper-wire kind for the bar cart (both of which are about $10 on Amazon), and I can say with confidence, pretty much nothing else in my house has as much visual impact as these little lights against a dark accent wall. (Which, again, you can get a pint of the paint for for about $15). Whenever you have a wall in your house you don’t know what to do with, incorporating a dark background and some string lights is an immediate way for it to look magical as hell. Here are some more ideas about using string lights, if you can’t figure out how to hang them.
9. A Mix of Real & Faux Flowers
I’ve written about this at length on TFD, but it bears repeating: one of the nicest balances I’ve found in my decor spending is having about 70% faux flowers, peppered with one or two bouquets of the real stuff. I get to have the nice once-weekly trip to the store for about $12 to choose my flowers for the week, and I get to have the rest of the less-prominent bouquets filled year-round (or rather, half-year, because I switch out the faux flowers for spring/summer and fall/winter) for $25 total. If, like me, you love the look of cut flowers, but can’t justify sinking $50 weekly into your habit, just pick the one or two bouquets that most warrant being fresh — for me, it’s the dining table and coffee table — and let the rest be faux. Painless, cute, and money-saving: the best kind of home decor!
