Budget Before & After: Julian’s $500 Brooklyn Kitchen Upgrade
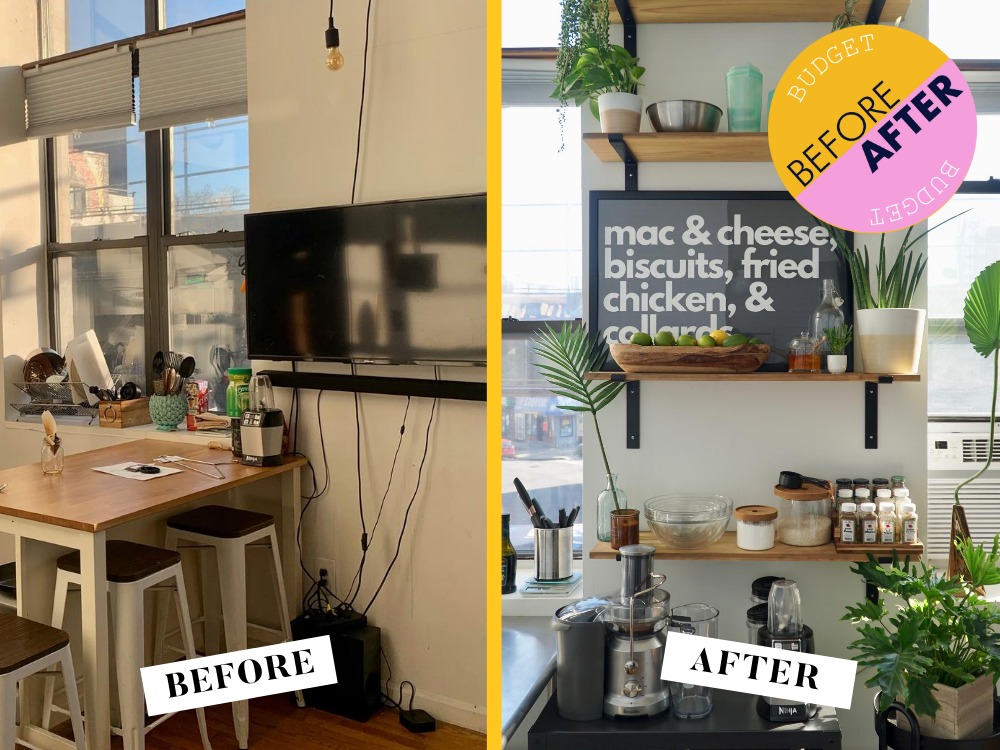
Welcome to Budget Before & After, a new TFD series where we highlight home decor projects our readers have pulled off on a budget. This week, we’re featuring Julian Thomas, a Bonafide Brooklyn Bachelor who has documented his gorgeous upgrades on his YouTube channel, Told By Thomas.
Hi, Julian! Tell us about yourself.
I’m proud to call myself a Bonafide Brooklyn Bachelor. I’ve been calling the borough my home ever since I was a teenager, so I like to say that I was here before all the cool kids moved in.
What made you want to redo your kitchen?
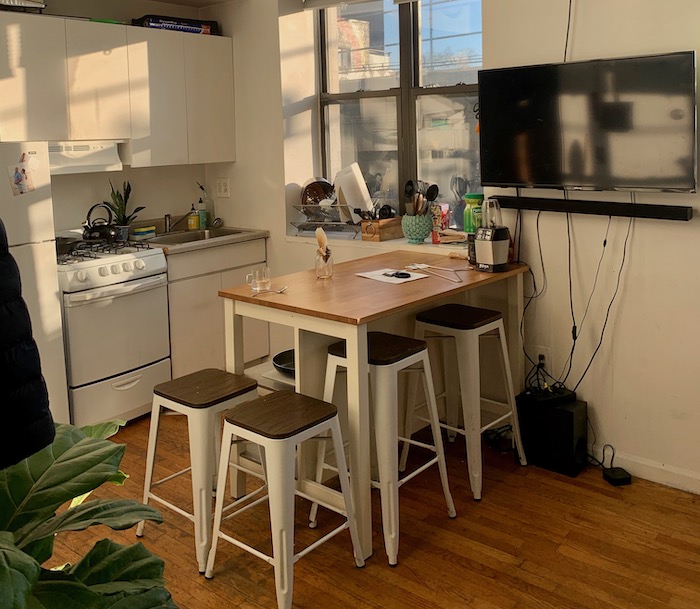
When I first moved into my apartment, there was little countertop space. In fact, there was NO countertop space. So I knew that I was going to eventually redo the kitchen, but I’ve been putting it off for the past couple of years. Then, I slowly started to tackle the process little by little beginning with creating a home bar and then moved on to dining.
I keep track of all my expenses in a spreadsheet for my DIY projects, and it really helps me stay on budget.
It got to the point where one half of my apartment looked really nice, while the other half was looking awful, and with quarantine happening, I had a lot of free time on my hands. So I just rolled up my sleeves and tackled the kitchen over a really long weekend.
It was amazing how small design changes could make such a big difference, turning the kitchen into a space where I actually wanted to spend time cooking, entertaining, or just having a quiet cup of coffee in the morning.
Every new detail made it feel more like home, and having a clear plan helped keep the project from becoming overwhelming. That experience taught me that even a modest space can be elevated with the right balance of creativity and planning.
I started looking into more professional insights on remodeling, and that’s how I came across tryangleconstruction.com, which focuses on making home renovation projects both practical and inspiring. Their approach reminded me that renovations don’t always have to start big—they can evolve step by step, just like my kitchen did. Seeing how they blend thoughtful design with efficient construction reinforced how much value there is in investing in your home.

Give us a brief recap of what you changed.
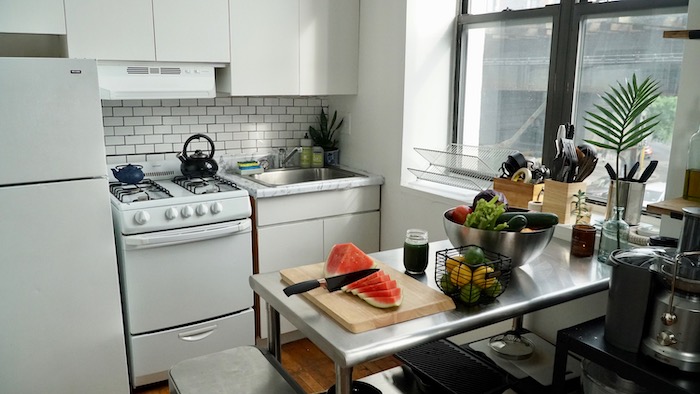
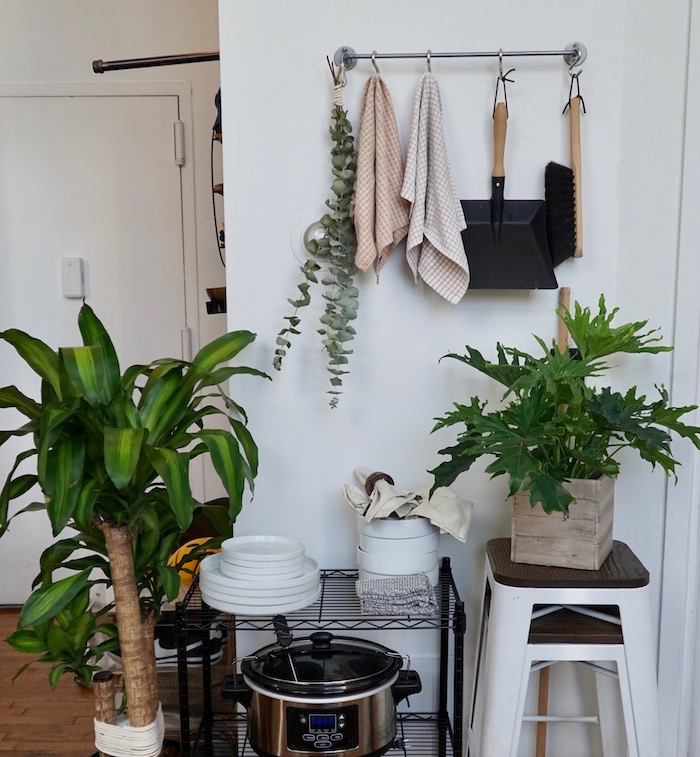
First I downsized my kitchen island, which sounds counterintuitive as I was complaining about having so little countertop space before. But I added an open pantry and other portable units for additional storage, which makes my kitchen so much more functional now. I really don’t need that much space for meal prep, and maximizing space in an NYC apartment is really important. I also added a subway tile backsplash. I’m very lucky to have a good relationship with my landlord, and he actually encourages me to get very DIY in my apartment.
How much did you spend on the project, total?
The kitchen itself (where I cook and meal prep), was fairly affordable. Under $500 I would say.
The big DIY projects like the open pantry and subway tile did not cost more than $250, combined! I keep track of all my expenses in a spreadsheet for my DIY projects, and it really helps me stay on budget. I already had the stainless steel trash can, and the new stainless steel island was a hand-me-down from a friend. The fancy kitchen tools and serveware was by far the most expensive part. Who knew matching plates and bowls were that expensive?!?!
How long did it take you?
I broke the project up into sections, so I would stay on budget and on schedule. I have a YouTube channel where I document the majority of my DIY projects, so I try not to rush to do everything at once (just so I can create as many videos as possible). Each section (the home bar, dining area, kitchen prep) didn’t take longer than a weekend.
What was the most challenging part?
The most challenging part had to be the subway tile backsplash. Buying tiles already formed into a sheet seems very efficient at first (just apply mortar, slap the tile sheet to the wall and grout), but it leaves very little room for error. If I was to do it again, I would take the time to lay each tile individually, just to make sure everything is perfectly even.
What was your favorite part?
I find cleaning and organizing to be very therapeutic.
This might sound a little strange, but cleaning up afterward was my favorite part. I find cleaning and organizing to be very therapeutic, and after putting in all of that hard work with the backsplash and pantry, cleaning up was definitely a release for me. Cleaning also helps me get acquainted with my new space.
What are a few of your favorite pieces?
I invested in a lot of quality food storage tools and those are my favorite pieces. I hate wasting food, and having items to properly store food so it lasts longer is a must. I’ve been doing my best to limit my single-use plastic (though it’s hard), and tools like Zip Top bags, Bee’s Wrap, and Dropps helps me cut my ties with single-use plastic around the kitchen.
Any advice for someone who wants to tackle their own budget DIY home makeover?
Plan, plan, plan. Spreadsheets are a great tool to make sure someone stays on track with budget DIYs. I not only create spreadsheets to track expenses for DIY projects, but I also use them to manage the overall project. I use spreadsheets to create wishlists and shop around for best prices. I also list when I purchased items that I need for the DIY, and when they are expected to arrive. Because I create so much video content as part of my DIY projects, I also link to the drafts of my scripts in the spreadsheet to make sure the production of my YouTube videos run just as
smoothly as the actual DIY.
If you take your time and plan ahead, you’ll have a DIY project you’ll be proud of. Be sure to take tons of before and after photos (just be sure to remember which angles you take the before photo from so you have a really dramatic after photo).

We’d love to feature your (inexpensive) upgrade! Send a before and after pic and a sentence or two describing it to submissions@thefinancialdiet.com with the subject “Budget Before & After.”
Like this story? Follow The Financial Diet on Facebook, Instagram, and Twitter for daily tips and inspiration, and sign up for our email newsletter here.
