
The Lazy Girl’s Guide To Sophisticated Living: How To Bake A Pie (Mostly) Without A Recipe
Read more of The Lazy Girl’s Guide series here!
It is no secret that I love pie with essentially all of my heart. I do not make it nearly as often as I used to, mostly because I’m actively trying not to eat a ton of sugar every single day. But I almost always make a pie or other simple baked good for potlucks and other social gatherings, in addition to the occasional just-because pie, which Peter and I end up eating for breakfast for a whole week.
And the biggest reason I turn to pie for most occasions is because — which you probably guessed from the title — it is so easy that, at this point, I don’t even need to read a recipe. I first started making them sans-recipe because I lost my beloved pie cookbook and decided to just work from memory. I knew my crust ingredient ratios by heart, and I realized that, if you’re making a fruit pie, you can basically just wing it. After a few years of making pies semi-regularly, I firmly believe that anyone could learn how to bake a pie without a recipe. (For the sake of ease, let’s just assume that whenever I mention “pie” going forward in this post, I’m specifically talking about classic fruit pies.)
Now, this isn’t one of those “if I can do it, anyone can do it” arguments. I’m no Martha, but I’m confident enough to call myself a solid baker. Standard baking skills definitely help. That said, pies are easier than so many other baked goods, mostly because they don’t depend on rising agents or super-exact proportions.
Necessary caveat: Of course, you can’t just wing it completely and expect to come up with an acceptable pie if you’ve literally never made one before. So, no, it’s not really possible to know how to bake a pie without a recipe if you don’t know the basic ground rules. That being said…I’m about to give you some basic ground rules. Which, yeah I guess, could be construed as a recipe. But, once you make this a few times, you’ll see how easy it is — and how much wiggle room you have! (I am fully ready to be told that I have been making pies incorrectly for the past seven years — just remember that this method does work for me, but if you have any other methods/alternating tips, feel free to let us know in the comments!)
How to bake a pie without an exact recipe
1. Buy or make your pie dough
Never let anyone shame you for using a store-bought crust. If that’s your comfort zone, go for it! It cuts a ton of time out of the whole pie-making process.
Of course, after saying that, I do have to admit that I always make my own crust. But!! It is not because I think it is inherently better than store-bought (which a lot of people do). It’s mostly because I really enjoy making the dough, and I almost always already have the ingredients on hand, so it’s one less thing to buy. (Also when someone asks in awe if you made the crust yourself, you get to say, “YOU BET I DID!” Which, I won’t lie, always feels really good, and if I’m being honest is probably 75% of the reason I make my own crust.)
There are a lot of different schools of thought when it comes to making pie crust, which baffles me, because a good old fashioned all-butter crust is the best-tasting (in my opinion) and easiest kind to make. Because if you do want to make your own crust, you just need to remember one ratio: 1 stick of butter for every 1 1/4 cups of flour. The butter should be super cold, so leave it in the fridge until you’re ready to go. And don’t worry about leveling off your flour — as I said, this isn’t an exact science. Add a big pinch of salt to the flour if you’re feeling fancy — it definitely makes a difference, but you probably won’t miss it if it’s gone. If you want to make a pie with a top crust or a lattice, just double the ratio — so 2 sticks of butter, 2 1/2 cups of flours, 2 big pinches of salt. And before you combine it, go ahead and get a cup of ice water ready to go. (Side note: if you look into pie recipes online/in cookbooks, you will find many, many people laying claim to their own all-butter crust recipe, exclaiming that you have never had a better pie crust in their life. Fun fact: all of these recipes are exactly the same.)
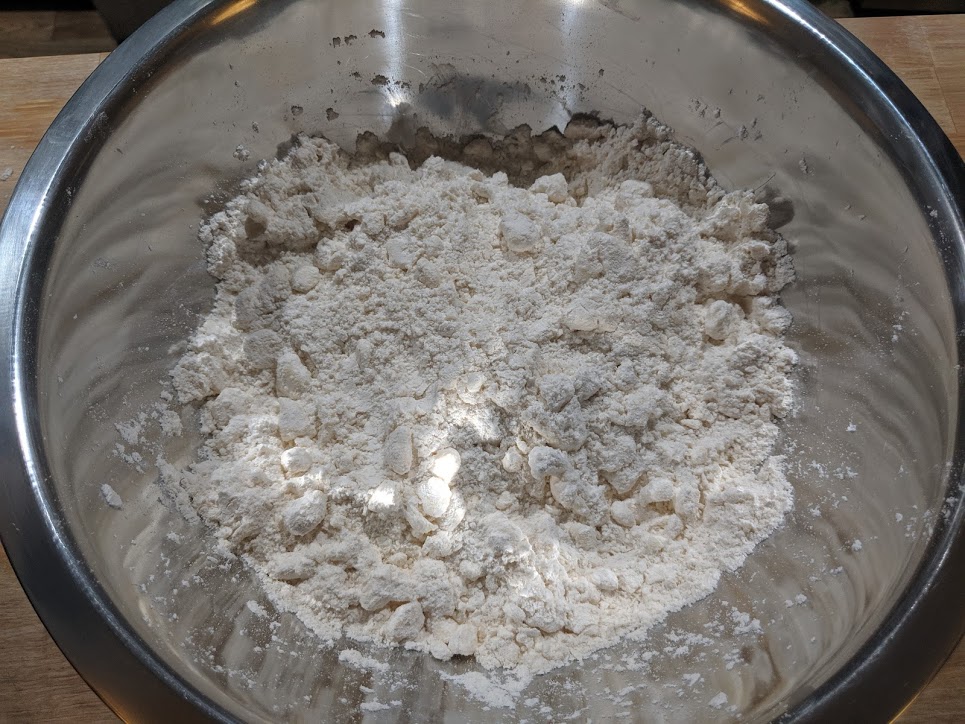
Now, to combine the flour/salt and the butter (which needs to first be cubed), most recipes will tell you to use a pastry blender, two forks, or a good processor. I don’t have a pastry blender or a big enough food processor to do this, and the two forks method is so freaking frustrating to me. So I literally just use my hands. (Yes I wash my hands super well first.) It is honestly therapeutic! But if you don’t want to get your hands messy, I think maybe you picked the wrong activity, but anyway just try out the two forks method I guess. Don’t say I didn’t warn you. The butter and the flour will be appropriately combined when it looks like “coarse crumbs.” It took me a very long time to understand that that just means it looks like this:
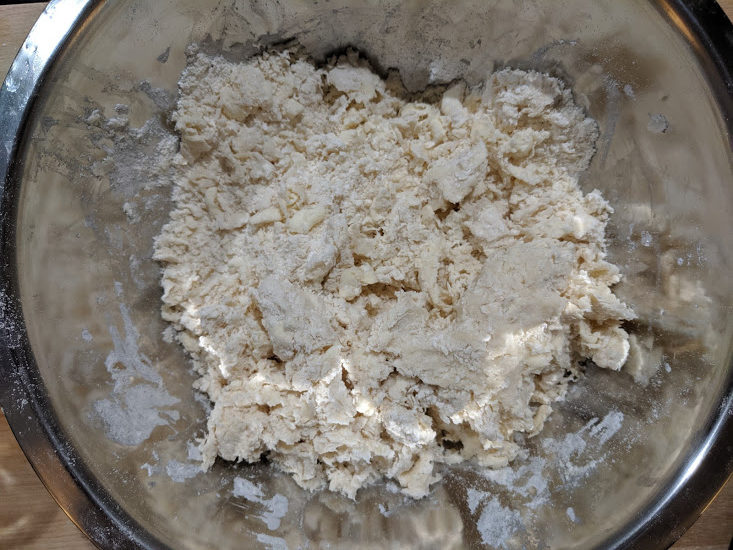
So mostly combined, but there’s still a fair amount of flour at the bottom. Now it’s time to add some ice water and make your dough look like dough! Here’s the thing, though: you’re probably going to need less ice water than you think you need. You don’t want the dough to be sticky, because it will both be a pain in the ass to roll out and take forever to cook (I have no idea if there is science behind this, but that’s been my experience). Add water a spoonful or two at a time and mix until your dough “starts to come together,” which really just means it looks like this:
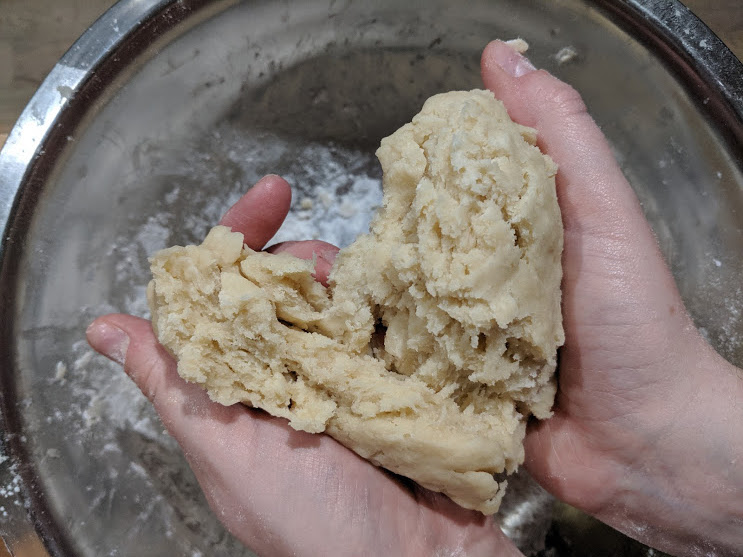
If you’re using a food processor, it will probably come together more obviously. Yay! For everyone else/my fellow lazy girls who don’t have a food processor, this is the point where you want to start kneading your dough by hand. Make sure all the flour gets absorbed, and if it does start to feel sticky, just add a bit more flour at a time. When you knead the dough and break it apart, this is the texture you’re looking for:
Now, make your dough into a thin-ish disk, wrap it in plastic, and leave it to chill in the fridge. If you made enough dough for two crust layers, go ahead and make it into two disks.
(The above looks like a lot, but I promise you, writing all of that out took me at least twice as much time as simply making some pie dough. But also, if you don’t feel like bothering, fuck it! I cannot reiterate enough how perfectly fine it is to get some premade dough from your grocery store.)
2. Prepare your filling
The best (and easiest) part!! Fruit pies are wonderful because you really can put anything in them that you want. I think it’s always a good idea to go with what’s in season and what looks good at your grocery store/farmer’s market. Bonus points if you go blueberry picking and use your findings in a pie! If you’re not sure how much to get, I think it’s always better to have too much fruit rather than too little. If you’re going with berries, 3 pint-sized containers is usually plenty; for apples and pears, 6 pieces of fruit is usually enough (sliced, but no need to peel in my opinion); and I haven’t made many stone fruit pies, but if you have about 6 cups of whatever, you should be fine. You just want enough to at least fill your pie crust to the top of the pan, if not a bit more.
I also always do a combination of whatever spices I feel like — usually cinnamon, cardamom, and nutmeg — that I think will go with the fruit. You can never go wrong with just cinnamon, and vanilla is almost always a good addition. I also can’t think of a pie that wouldn’t be great with some lemon zest and juice if you have a lemon lying around (the juice and zest of one lemon in a pie would be plenty). You can certainly measure them out, but a teaspoon-ish sized heap is always a good bet.
Now, when preparing a filling for most fruit pies, there two numbers to remember: 1/2 cup of sugar and 1/4 cup of cornstarch. (You can substitute quick-cooking tapioca for cornstarch, but I can’t personally speak to that. You can also use flour, but I don’t think it thickens quite as well.) Apple pies typically need less thickener — I usually use just 2 tablespoons of cornstarch. I always basically go with about 1/2 (one-half) cup of sugar, or more if berries aren’t particularly sweet (such as raspberries). Feel free to use brown sugar or maple syrup instead if you want! If you mess up and end up not adding enough sugar, don’t panic — you can just serve the pie with vanilla ice cream.
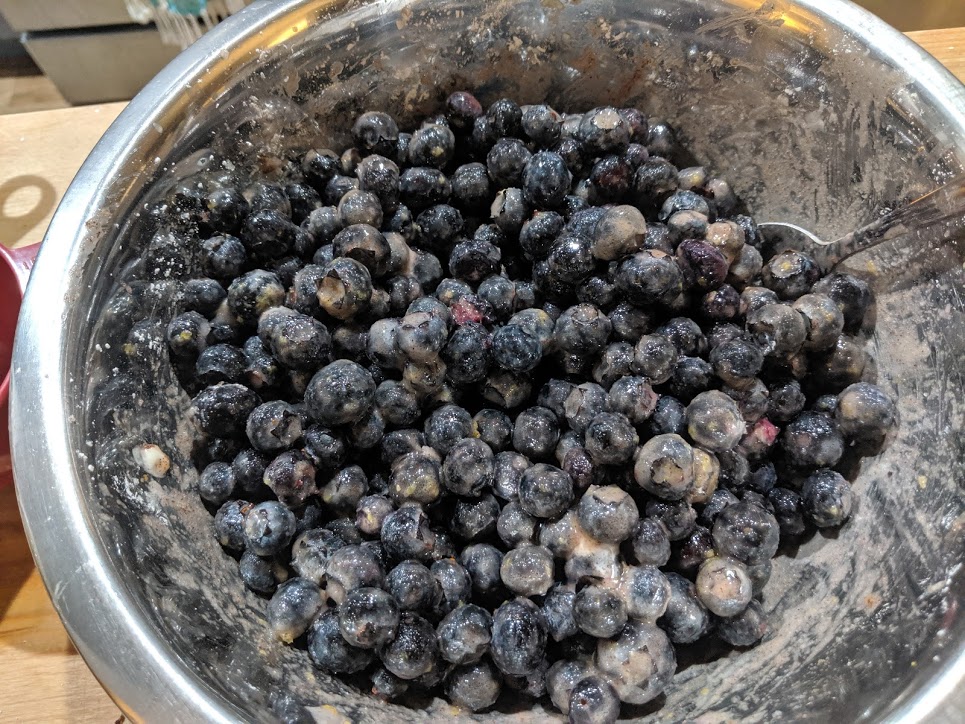
Mix the filling in a bowl before you start assembling your pie; you want to make sure every piece of fruit is coated with the cornstarch/sugar/spice mixture. It will look something like this:
3. Assemble the pie
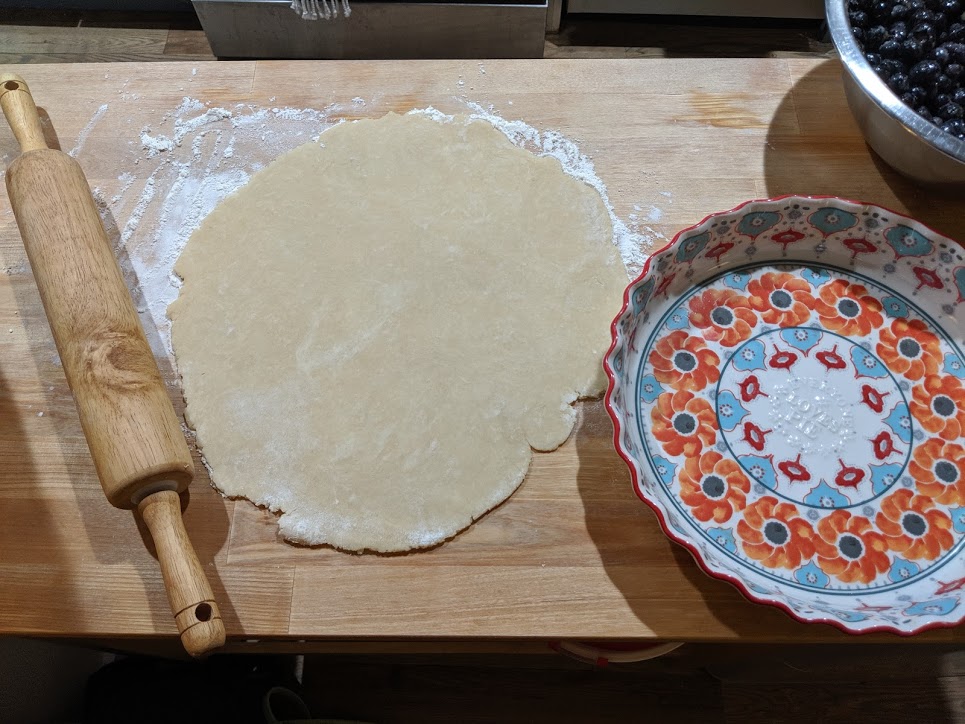
I am not sure how Food Network personalities are always able to roll their pie crust out into perfect circles because I sure as hell can’t. But also, I don’t care! You can make your pie pretty later. When rolling out your bottom crust, use a little flour on your rolling surface and rolling pin so it doesn’t stick to anything. Make it a few inches wider than your pie pan:
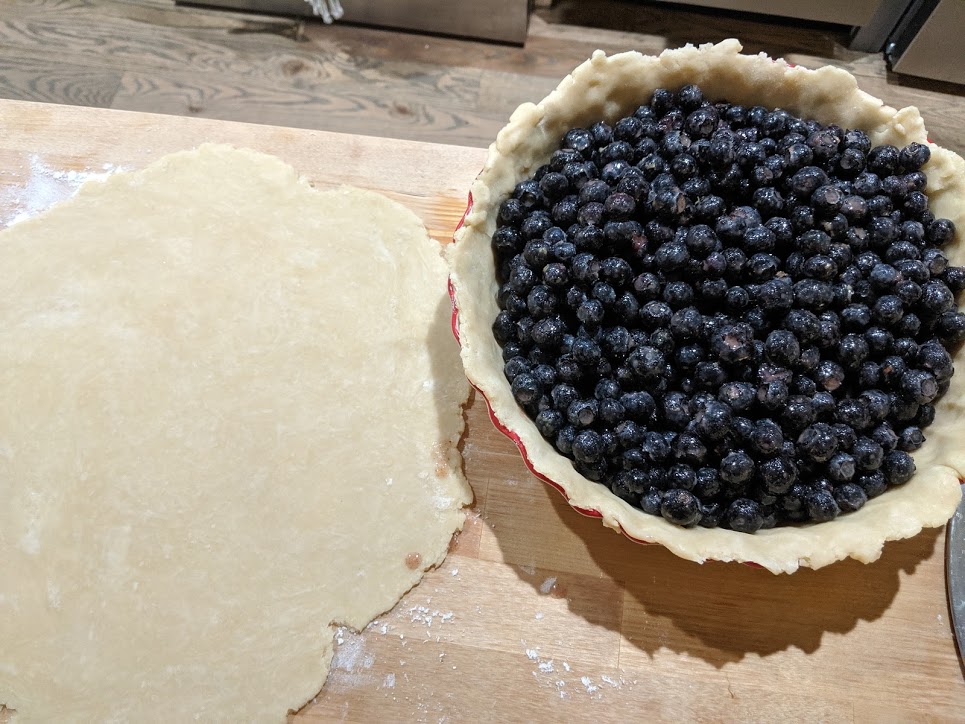
Then, cover the pan with the crust and press it into the bottom and sides of the pan. If you have time, it’s a good idea to chill the bottom crust in the fridge for ~20 minutes, but if you don’t have time or don’t feel like, I won’t tell. Don’t worry about trimming yet, just make sure the sides of the pan are covered. Once the crust is ready, fill it with your fruit! If you’re not doing a top crust, just trim the edges of your bottom crust. You can “crimp” or “flute” the edges if you like, which is just a fancy way of saying use a fork or your fingers to make the edge look a little fancier. If you’re doing a top crust, wait to flute the edges until you have both crusts in place. Roll out your second dough disk, of course:
Now, people appreciate it when something you make looks pretty, but also, they just like eating pie. So yes, you could make a lattice with your top crust, which I love to do — but it is by no means necessary. (Here’s a solid tutorial if you’re interested.) Otherwise, just cover the filling with your top crust and flute or crimp your edges:
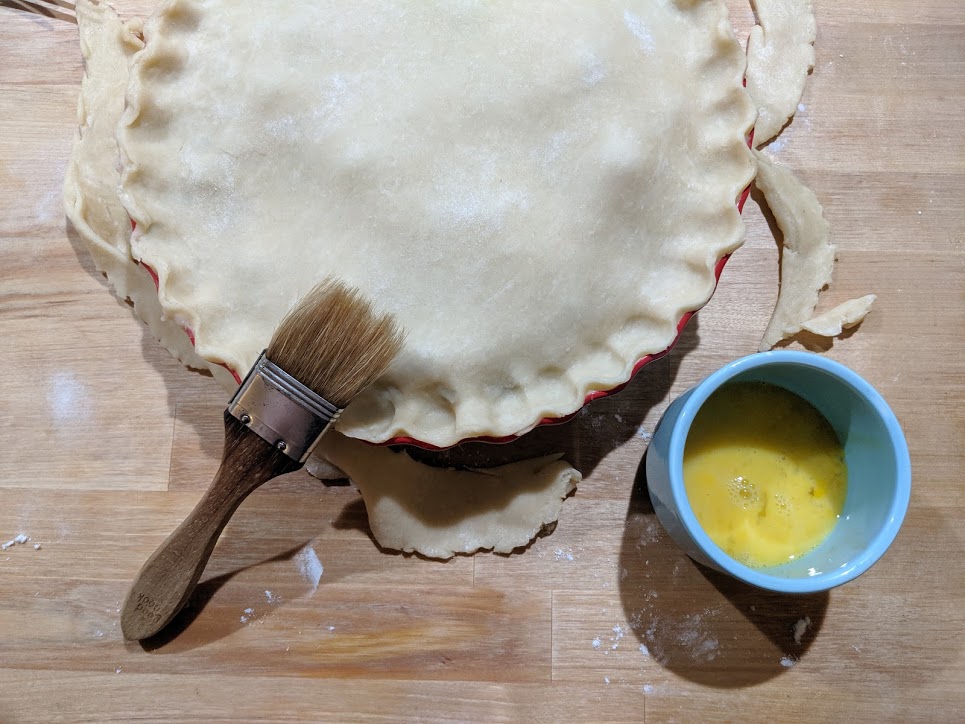
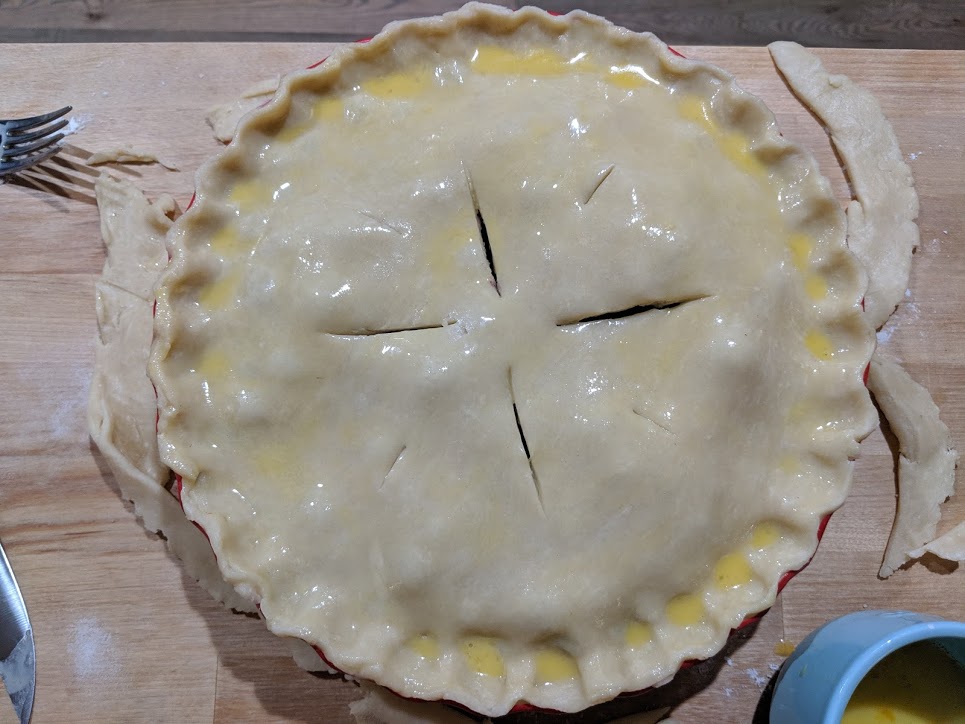
You’ll see above that I made an egg wash to prevent the pie crust from burning, which is just an egg mixed with a big spoonful of water or milk. Always a good thing to do, but not the end of the world if you skip it. Just brush it on top of your top crust or lattice, cut a few slits, and you’re ready to go!
4. Bake the thing!
Now, all recipes say something different when it comes to baking times and temperatures. I pretty much always bake my pies at 375°F for as long as it takes, which varies based on what’s in the pie/probably other factors that I’ve never thought about. Also, the filling will definitely overflow, in a good way, but you don’t want to have to clean that off the bottom of your oven — be sure to place your pie on a baking sheet before putting it in the oven. Your pie will be done when the filling is bubbling and the crust is golden. I promise you the crust will not be golden if the filling is not also bubbling! Also, if you have to ask “is it bubbling? I think that looks like bubbling?” it is not bubbling. Trust me, you will know. Time wise, I start with 45 minutes and keep checking after that — it usually takes a bit more than an hour.

And voila! Except not really! Do NOT cut into the thing until it has cooled all the way to room temperature. I know, extremely sad. But you will be sadder if you cut into it earlier and it’s all soupy because you didn’t wait until the filling set! I promise!
TL;DR: Easy ground rules for how to bake a pie
Wow, this was so long! I cannot reiterate how much less time it takes to bake a pie than to write about how to bake a pie! These are the most important things to remember:
- 1 crust = 1 stick of butter + 1 1/4 cup flour
- filling = ~6 cups of fruit + 1/2 cup sugar + 1/4 cup thickener + spices
- bake until the filling is bubbling
- cool to room temperature
I hope you all find this method as easy as I do, and I promise, after just a few times making it, you’ll have it memorized by heart — no recipe needed!
Like this story? Follow The Financial Diet on Facebook, Instagram, and Twitter for daily tips and inspiration, and sign up for our email newsletter here.