3 Minor DIY Projects That Made A Major Impact On My Home, & How Much They Cost
I moved into a new apartment with my boyfriend, Peter, a little more than a week ago. I was beyond excited — while the moving process is kind of terrible (especially when you are moving into a building from the 1930s, which was apparently all about extremely narrow doorways), I’d started planning out our new rooms as soon as we found the apartment back in late February. We’d saved up more than enough money for the first month’s rent and security deposit, and started to use the remainder to get some new furniture and decor to really make the place feel like our own.
This was always the plan. I moved in with Peter last May, into an apartment in the building he’d been living in for several years. We were never going to stay there long — the rent was too high, it was only one bedroom, and it was in a neighborhood that was less than desirable in regards to the noise level, expensiveness, and proximity to public transportation, among other things. So while we hung pictures on the walls, bought new bedding, and kept it clean, that place never felt anything more than temporary.
So, when we were about to move into our new place, I had already invested a lot of time into planning exactly how I wanted it to look. But here’s the thing: decorating a home can get expensive. Even though we got almost all of our new furniture (including a bed, sofa, coffee table, and TV stand) from inexpensive places like Ikea and Wayfair, our list of things to buy was long and added up quite a bit. We pretty quickly realized we’d be spending money beyond what we’d initially saved for finding the apartment, but we still wanted to get everything over and done with, so we could start living in a place that felt “finished” as soon as possible. We ended up making a Google spreadsheet to keep track of what came out of our combined savings, and beyond that, who bought what.
This is not the most budget-friendly way to go about decorating a space. If I were to be instructing someone on how to approach decorating a new apartment, I would probably advise them to do it gradually, so that their bank account wouldn’t take so many hits all at once. Or, I’d at least tell them to plan way ahead and save up for six months to a year beforehand if they wanted to get it all out of the way at once, like we did. This is what we tried to do, as we had been planning to move for over a year, but our savings ended up not being able to cover everything we wanted it to. We ended up simply upping our month’s spending, which was thankfully doable; our first month’s rent for the new place had come out of our savings, so having no rent payment for April month gave us a lot more wiggle room to spend more than usual (and still contribute our usual amounts to savings).
While I could go into everything we’ve spent on the apartment and what I would maybe do differently in the future (which I’m totally willing to do — comment if that’s something you’d want to read!), I want to focus on the few inexpensive projects we’ve done in the past week that are a lot more financially attainable in the short term than furnishing and decorating an entire apartment. I decided to DIY the below projects because it was much cheaper than buying new or paying someone else to do them, and also because I love the sense of accomplishment and bragging rights that come with DIYing. I’m not by any means a DIY queen, and I had a lot of help from Peter in terms of the physical labor required, but I think each of these projects are easy enough for a single person to do. Without further ado, here are the three projects we chose to DIY in our new home, and how much each cost us.
1. Painting an existing piece of furniture.
About a year and a half ago, Peter noticed a wine cabinet in a pile of garbage on the sidewalk and made me carry it home with him. (Furnishing an apartment from sidewalk findings is actually pretty common in New York, though I never recommend picking up something fabric-based off the street, especially a mattress. And in all honesty, you’re better off finding something inexpensive that you actually like at a flea market than waiting until you find something worthwhile you want to pick off the street for the purpose of refurbishing it like this, but I digress.) Here is a (bad) photo of what the cabinet used to look like, two apartments ago:

It certainly wasn’t awful, and it was clearly well-made, but I was never a huge fan of the super dark wood — and thankfully, Peter wasn’t attached to it, he just liked the fact that it was free. Ever since we moved in together, I have planned on painting it…I just never got around to it in our last place, and I also couldn’t decide on a color. But when I came up with a color scheme for our new living room (dark green, light pink, gray, teal), it was much easier to narrow down a color I wanted it to be, and I decided on teal. (I love colors and would have had a hard time justifying putting all this time in just to paint it white.) I also bought brass cabinet pulls to replace the dated stainless steel ones.
The whole project involved (lightly) sanding the rough parts of the cabinet to make them more even, cleaning the wood, painting it, and screwing in cabinet pulls. Peter took care of installing the pulls, and I did everything else. We already had our own paintbrushes, wood cleaner, and plastic tarps (left over from moving). This is what everything else cost us at Home Depot/Amazon:
- Behr paint + primer combo in Vintage Teal: $28.98
- Pack of sandpaper: $4.27
- Painter’s tape: $9.21
- Cabinet pulls (pack of 5): $12.99
- Total: $55.45
Here’s what it looks like now (ignore the fact that one of the pulls is uneven/another has yet to be attached):
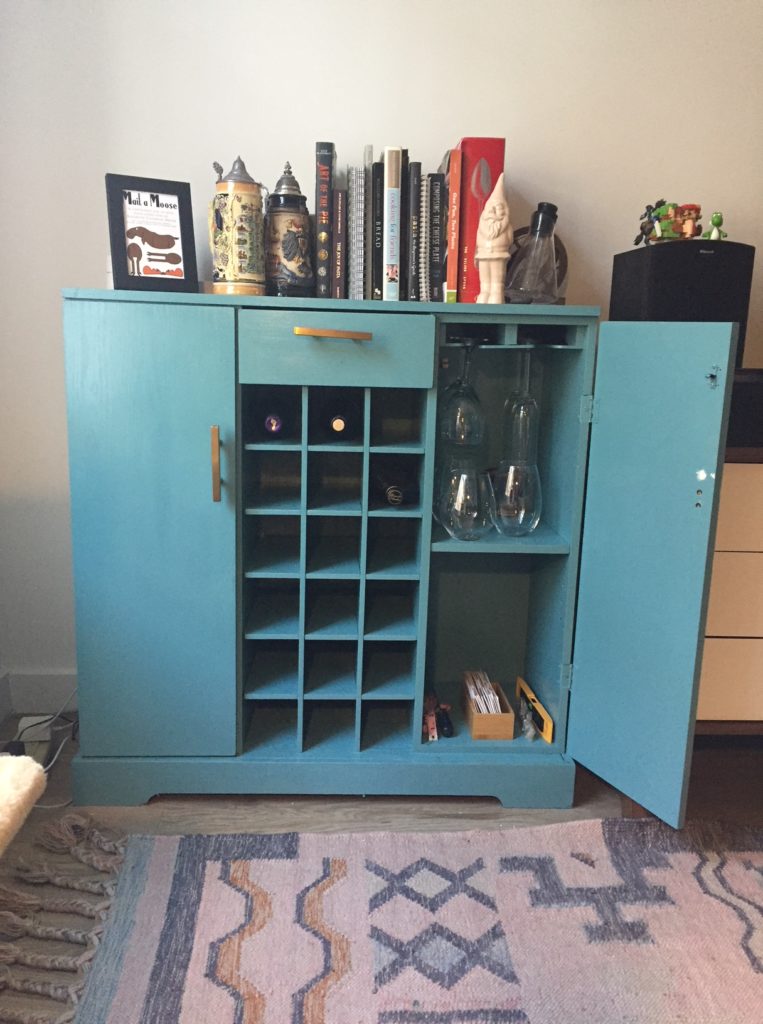
A couple of things: I was super happy with the quality of the paint, but we also could have gone with a quart instead of a whole gallon. The salesperson convinced us to get a gallon just in case, but I should have gone with my gut, because it would have saved me about $15 (and I wouldn’t be left with three-quarters of a gallon of blue paint I have no idea what to do with). Also, the smallest pack of the cabinet pulls I wanted included five, so I now have two left over, but they were still a good deal. Despite the fact that we put one in unevenly (whoops), I’m super happy with how it looks! The painting part probably took me two hours total, plus a two-hour break in between coats. If you have a piece of furniture that you don’t love despite how functional it is, definitely consider painting it instead of getting rid of it. Or, keep an eye out for a good flea market find with the knowledge that it’s really not so expensive to DIY a new color. If I’d have had a bit more foresight, I could have made this project cost closer to $40 — or even $28, if I’d considered simply keeping the old hardware.
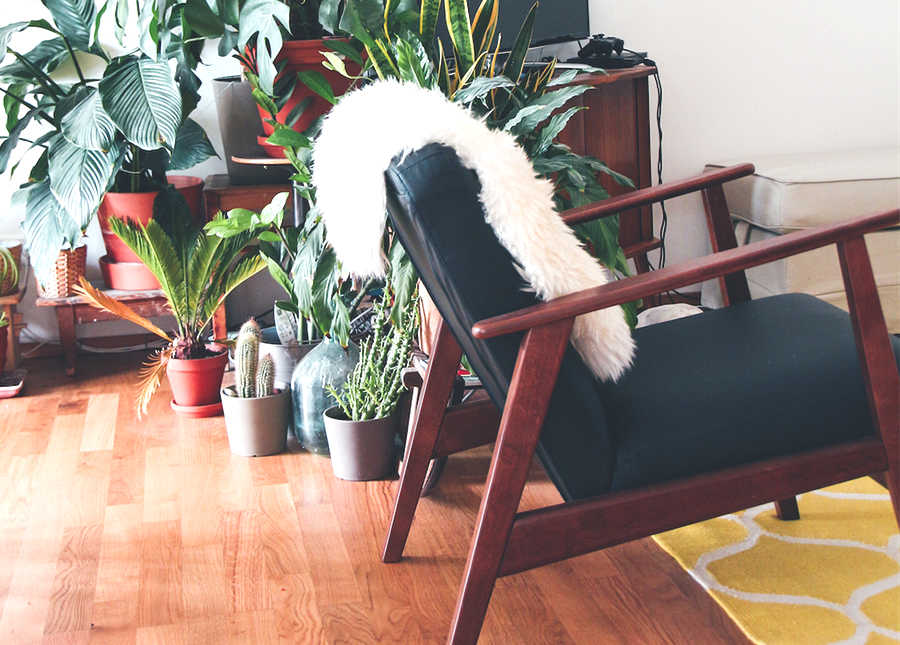
2. Making over a basic shelving unit.
In our last apartment, we had a big window that took up the whole width of the wall, which meant we ended up storing many of our books on the window ledge when the one bookcase we had didn’t provide enough room. I wanted more book storage, but I didn’t want another bookcase because of the inevitably large amount of space they take up on the floor. I came across this DIY desk/shelving unit, which I loved and knew Peter would love, too. The basic idea was to take a simple Rubbermaid customizable (and very utilitarian) shelving unit and spray paint all the hardware gold to make the look of it a bit more elevated. And that’s it — I love the way it looks, but it’s just a super basic shelving unit. Here’s what everything cost at Home Depot:
- 3 Rubbermaid upright 47.5″ twin tracks: $22.98
- 12 Rubbermaid 9″ twin brackets: $42.96
- 4 Rubbermaid 10″x36″ shelves in Cinnamon: $31.92
- 3 Rubbermaid hardware packs: $8.16
- Rust-Oleum spray paint primer: $4.98
- Rust-Oleum gold spray paint: $6.28
- Total: $117.28
Here’s a look at the finished product:

Full disclosure: it was my idea to do this, but Peter actually did all of it, including spray painting all of the hardware one evening this week while I was at yoga. Spray painting took him about an hour using the same moving-day plastic tarps we already had, and hanging everything took about two hours, so three hours total. I will say, there are plenty of bookcases I’ve seen online for much less than the $117 price tag on this project. However, I haven’t been able to find a hanging shelving unit of this size that I’ve like as much for less money, and I also already knew/appreciated how sturdy these Rubbermaid units were. But maybe I’d feel differently if I’d actually painted and installed the whole thing myself. Regardless, this is definitely a project I could have completed on my own if I were living alone, and I feel comfortable knowing that despite the fact that these are wall shelves, they’re not going to collapse under the weight of our books.
3. Painting an accent wall.
And now for one of the most basic, but also most noticeable, DIY projects: painting an accent wall. I’d somehow made it through 26 years of my life never having painted a wall, despite the fact that I consider myself a mildly crafty person, and I’ve always wanted to. Since I knew we were planning to hopefully stay in this space for several more years, I figured now would be the perfect time to try it out. I have to admit being inspired by the dark-colored accent walls Chelsea and Lauren both have in their homes. Peter and I both love green, so we settled on a dark green wall to go with the light and bright colors filling the rest of the rooms. Again using the same tarps (and technically the same painter’s tape from the cabinet-painting, though I’m going to include it again here because they are technically separate projects), here’s what we spent at Home Depot and a local hardware store:
- Paint rollers + tray set: $11.97
- Blue painter’s tape: $9.21
- Benjamin Moore ben interior paint in Hunter Green: $42.99
- Total: $64.17
Here’s the finished product after hanging several frames:
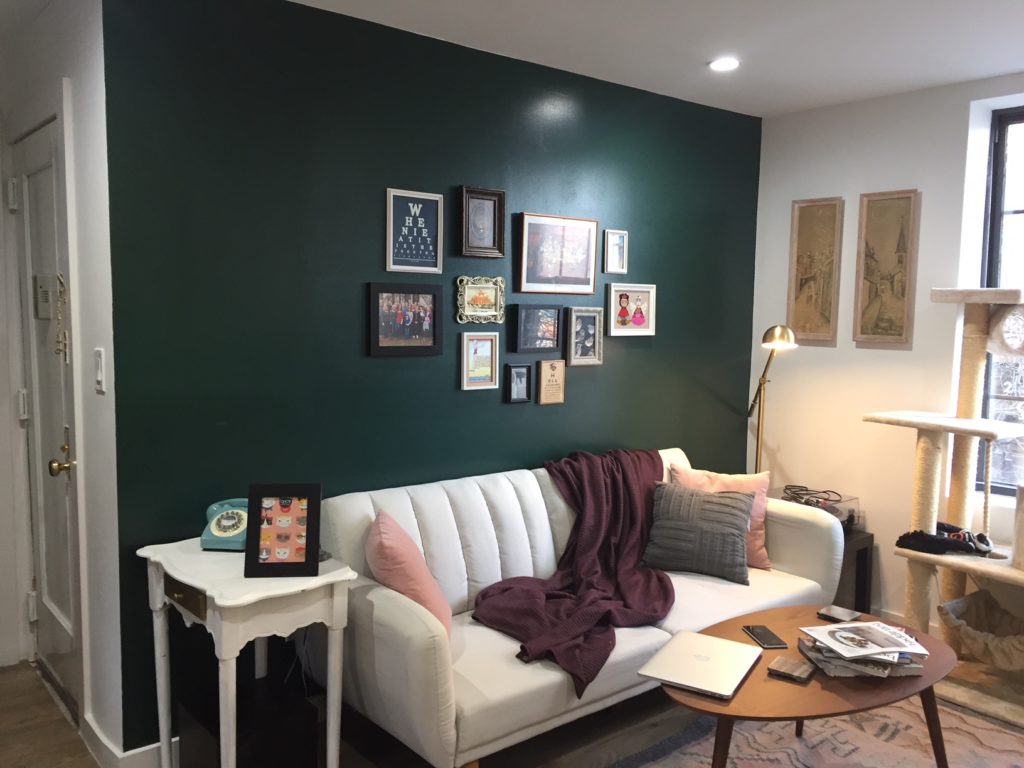
I didn’t get primer, since the apartment had been newly renovated and painted white. Also, I could have gone with a less expensive paint brand, but I couldn’t find a color I liked as much at Home Depot, so I spent the extra $14 or so to get the color I really loved from a nearby hardware store. I have to say, painting was so much fun, which I honestly kind of expected. I also found out that if you accidentally get green paint on your white ceiling three times, it will come off with one of those magic erasers. Phew. I did get the semi-gloss finish, which does make it a bit more glare-friendly/more difficult to photograph, but it also feels a bit more special in my opinion.
*****
I decided to put all this work into this new apartment because it’s felt like my first-ever “real” home. And I admit, having a partner and DIY-teammate has made the whole process easier — yes, practically and financially speaking, but also just to have someone else who was just as excited to take on these projects as I was. But the truth is, I could have accomplished any of these three projects in any of my previous living situations. Just because I hadn’t thought of them as permanent doesn’t mean I couldn’t have put the same amount of care into them, especially considering these three projects simply took a combined long weekend to finish. Yes, I had roommates previously, but I’m sure most of them would have been just fine with me painting a wall, especially if I’d promised to paint it white again by the time our lease was up.
I’ve invested much more of my time into this new place than I ever have into an apartment before, and I can already tell how much of a difference it makes into how I feel about my home. I’m already pretty much of a homebody, but now, I’m even more excited about nights spent in and hosting guests for dinner parties. If you want to get a little more excited about your current living situation without sinking a ton of your budget into it, I highly recommend taking on a DIY project.
Holly is the Managing Editor of The Financial Diet. Follow her on Twitter here, or send her your ideas at holly@thefinancialdiet.com!
Image via Unsplash