Budget Before & After: TFD Founder Chelsea’s $700 Luxe Manhattan Kitchen
Welcome to Budget Before & After, a new TFD series where we highlight home decor projects our readers have pulled off on a budget. This week, we’re featuring TFD’s own CEO, Chelsea Fagan, who recently revamped her gorgeous Morningside Heights apartment. Specifically, Chelsea tells us how she got her kitchen looking so chic!
Hey, Chelsea! What made you want to redo this room?
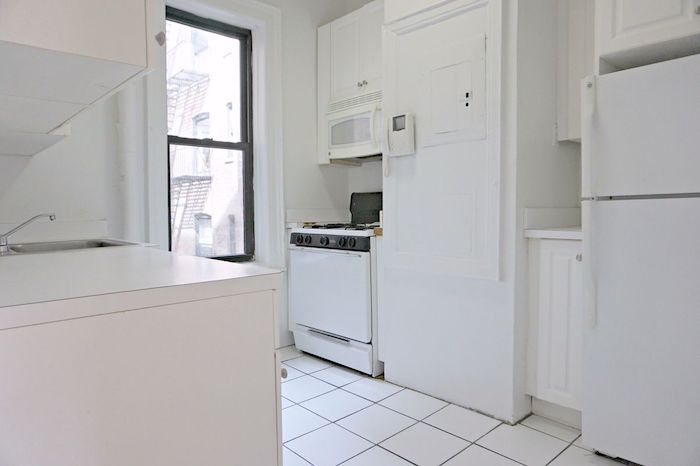
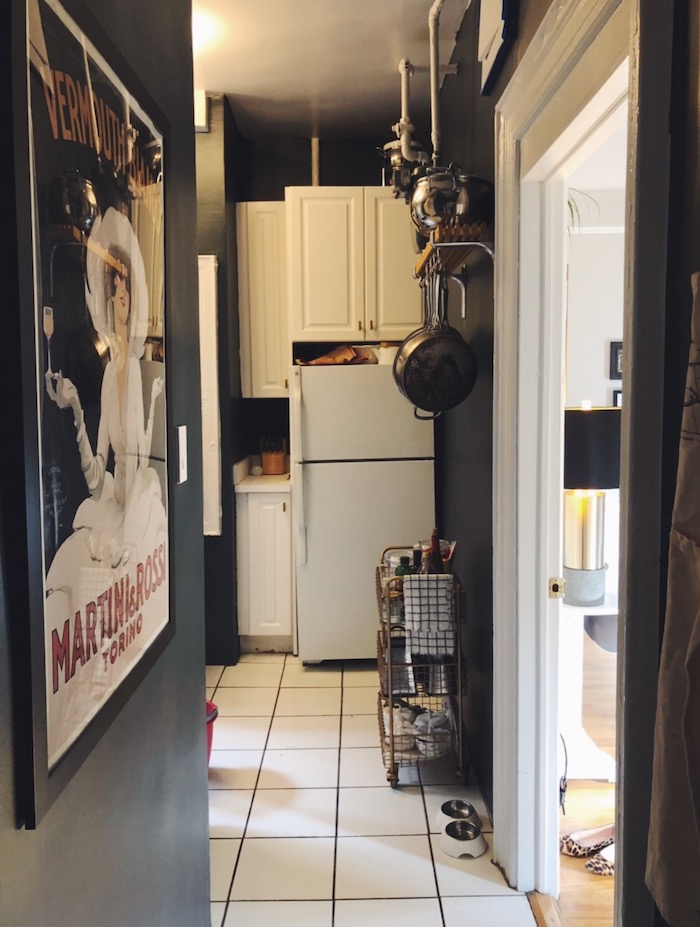
I spend quite a lot of time in the kitchen, and while this one is well laid-out and fairly big by New York City standards (I know that this may come as a shock to some readers), the white-on-white-on-white with fluorescent lighting was just not going to work. First of all, I cannot bear fluorescent lighting in any context, but combined with the all-white sterility, it made the room feel like something out of a Stanley Kubrick movie.
It’s a rental unit, but I’m very much of the opinion that if you are going to live in a rental unit for any decent amount of time, it’s worth it to make the feasible upgrades that will increase quality of life. So making adjustments in this space where I spend so much time was a no-brainer.
Tell us what you changed.
Things that are wall-mounted and super-functional always add a certain degree of intentionality and weight to a room.
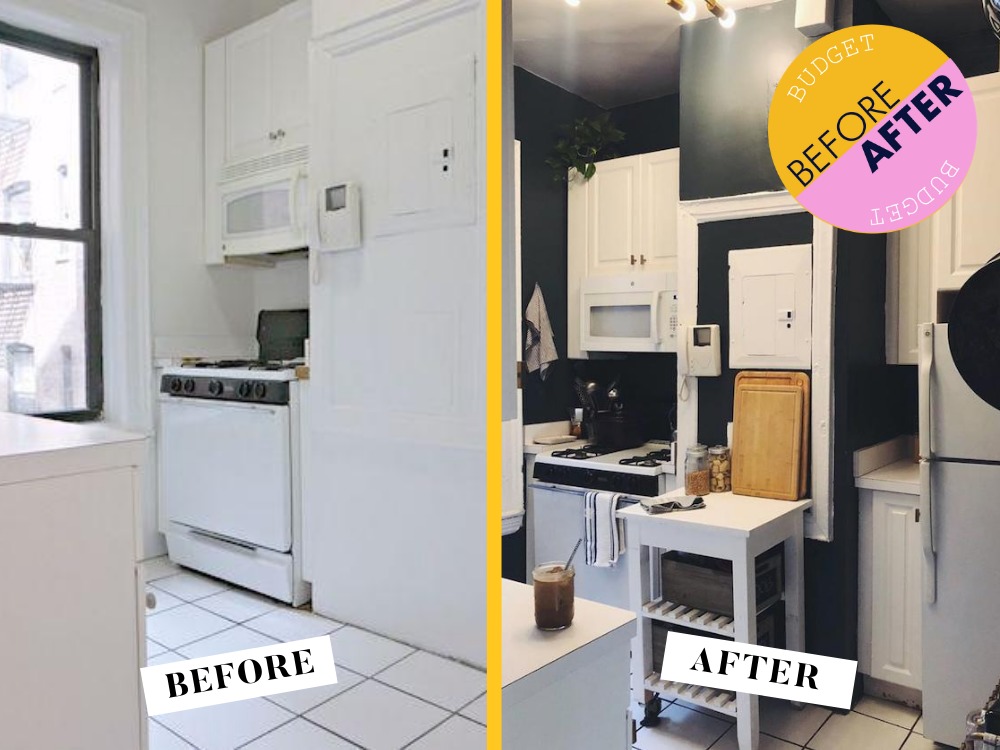
The changes are actually relatively minimal, with the biggest one obviously being painting the walls a dark blue (in this case, Benjamin Moore Hale Navy). I wanted something striking, rich, and dark to contrast with the rest of the kitchen (cabinets, floors, counters, etc) which would remain white. I generally prefer a brighter wall color for a kitchen, but I really feel like you have to lean into the constraints and follow them in a rental unit, so anchoring down that white was really the only option.
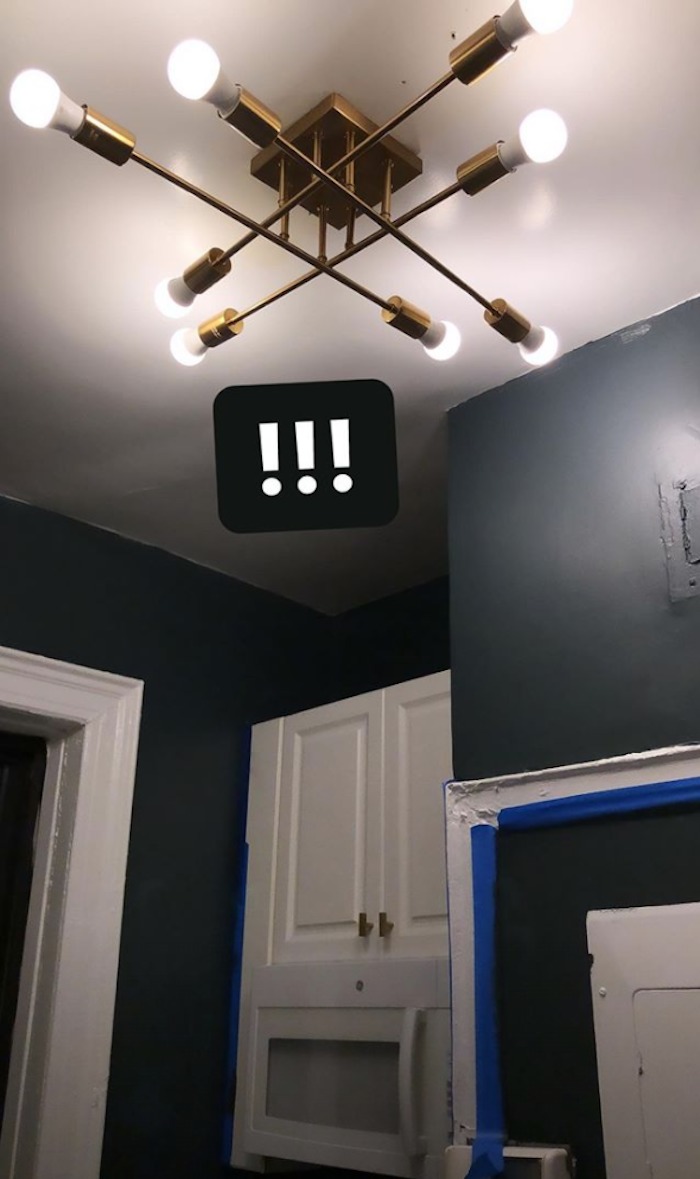
Then, I bought a ceiling lamp and hired an electrician to swap it in for the fluorescent light and put it on a dimmer switch (I love a dimmer switch generally, but it’s very convenient here, as the eight-bulb lamp can get quite bright and we often entertain, so it’s nice to have the option of slightly more soft lighting in the kitchen when we have people over).
Small upgrades like this often make the biggest difference in how a space feels and functions day to day. A well-installed fixture paired with the right controls can completely shift the atmosphere of a room, especially in social areas where lighting needs to move easily from practical to inviting. An experienced Elektriker 1230 Wien can help ensure that dimmers are correctly matched to the fixture, wiring is safely configured, and the overall setup supports both efficiency and longevity. With the technical side handled properly, homeowners can simply enjoy the comfort of a kitchen that adapts effortlessly from bright morning routines to relaxed evening gatherings.
Beyond lighting upgrades, thoughtful electrical improvements can continue to enhance both the comfort and functionality of a home, especially in spaces that see frequent use. From adding conveniently placed outlets to upgrading panels that support modern appliances, each adjustment contributes to a smoother and more adaptable living environment.
Attention to detail in installation ensures that everything operates reliably behind the scenes, allowing homeowners to focus on how the space feels rather than how it functions. In this context, Heath Electrical Services, LLC supports these enhancements through careful planning and precise execution, helping to ensure that every addition integrates seamlessly with existing systems. With a strong emphasis on safety, efficiency, and long-term performance, such electrical work reinforces the idea that even subtle upgrades can have a lasting impact on how a home is experienced day to day.
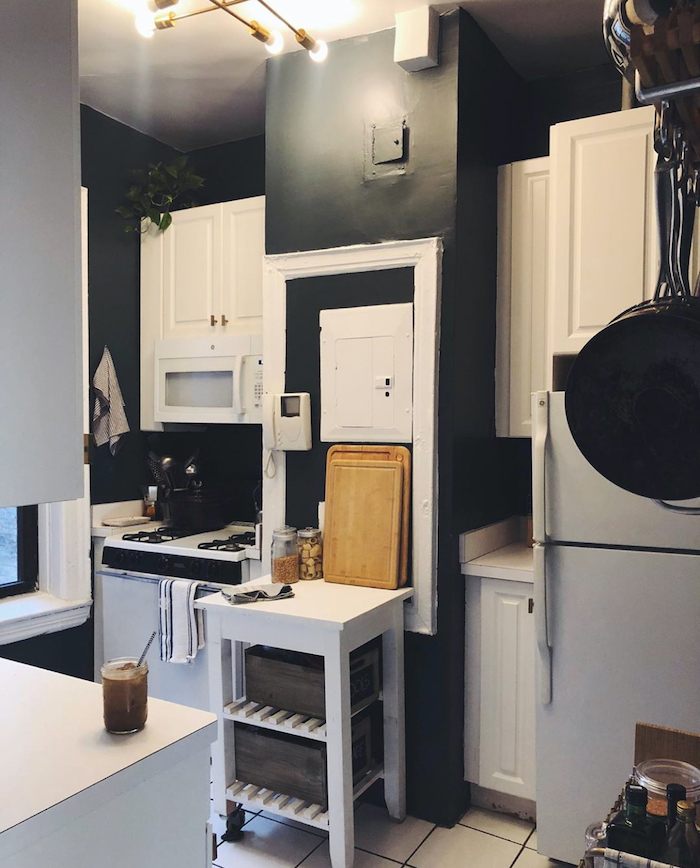
We then mounted a pot rack (this $50 wood-and-metal unit we got from Amazon nearly seven years ago has never let us down, apartment after apartment), because it’s both convenient but also makes use of relatively limited space. Also, things that are wall-mounted and super-functional always add a certain degree of intentionality and weight to a room, which goes a long way in a rental unit.
Lastly, I swapped out all the handles and pulls for brass ones to match the new ceiling lamp and continue the general motif of brass/navy/white that has taken over the kitchen. I’ve also added a large print in the little hallway leading into the kitchen and dining area, as well as made a few other decorative additions to increase the warmth in the space.
How much did you spend on the project, total?
A relatively simple change can make a massive difference.
I would say for the swaps I made (lighting, paint, handles, etc), it probably totaled around $700 between materials and labor.
And how long did it take you?
I work extremely quickly and decide what I want/acquire all the materials before move-in generally, so it took about three days. But again, bear in mind I did hire some help and I have my husband, so I wasn’t doing it entirely myself.
What was the most challenging part of the project?
So really none of it was hard, but again it’s worth stating that for the task that would have been very complicated and potentially dangerous (swapping out a light fixture), I hired an electrician. I’m a believer in soliciting help for certain tasks that either require technical skill you don’t have or would take you an extremely long time and a professional very little.
It’s an expense for sure, but depending on the nature of the project, it can be very much worth the investment. When projects go beyond basic installations and involve more advanced requirements, it becomes even more important to rely on highly skilled professionals. Services such as those provided by level 2 electricians from electric express are designed to handle specialized tasks like connecting power from the grid, upgrading systems, and addressing complex electrical challenges that go well beyond the scope of everyday repairs.
Choosing licensed experts for this kind of work guarantees not only that safety codes and regulations are followed, but also that the results are reliable and long-lasting. By prioritizing expertise and compliance, you can be confident that every aspect of your electrical system supports both safety and efficiency for the long term.
Many homeowners and property managers find value in building long-term relationships with professionals who understand the history and layout of their electrical systems, allowing work to be done efficiently and with minimal disruption. In this context, teams such as Knoll Electric electricians are often discussed as examples of contractors who approach projects with preparation, clear communication, and respect for safety standards. Relying on experienced professionals for both planned work and unexpected issues ensures that electrical systems remain dependable, compliant, and capable of supporting daily needs without unnecessary risk or repeated fixes.
What was your favorite part of the project, and what are a few of your favorite pieces?
I absolutely love my lighting fixture (and the fact that it’s on a dimmer!), but in terms of my favorite moment of the project, I really loved putting up that print in the little hallway, since I’ve always loved it and it’s rare that you find a piece of art that just perfectly fits an otherwise-awkward space. I have it hung up across from my aprons and it’s always a happy little place to walk through on my way into the kitchen.
Any advice for someone who wants to tackle their own budget DIY home makeover?
Remember that a relatively simple change can make a massive difference (in this case, switching up a paint color) and that you don’t need to wait until you own a place in order to really invest in how a place feels every day. As a New Yorker, it’s likely I’ll be renting for some time to come, and so I make the choice to invest in each space I live in as if it were permanently mine, because the experience you have in your home every day is very important to overall mental health and quality of life (especially these days). So give yourself permission to make substantive changes, and see where a little effort can go a long way!
We’d love to feature your (inexpensive) upgrade! Send a before and after pic and a sentence or two describing it to submissions@thefinancialdiet.com with the subject “Budget Before & After.”
Like this story? Follow The Financial Diet on Facebook, Instagram, and Twitter for daily tips and inspiration, and sign up for our email newsletter here.