4 DIY Hair Products That Made Both My Hair & My Budget Healthier
The multi-billion-dollar beauty industry exists to sell us products. They make us believe that in order to be beautiful, we just have to own and regularly replenish the right items. I spent the first 20 years of my life buying into this myth and spending thousands of dollars to live up to societal standards. The interesting thing was, no matter how much money I spent on expensive products or how much time I spent getting ready, I never quite felt beautiful enough. (This is true for more than just hair; you can read about my experience with skincare products here.) Luckily, I eventually solved my problem with DIY hair products.
The hair industry is particularly troubling because it exists as a vicious cycle of creating and solving problems with products. Take the shampoo and dry shampoo cycle. The hair industry sells us shampoo marketed to make our hair voluminous, soft, shiny, etc.; what the products actually end up doing is stripping our hair of its natural oils, which dries out the scalp. Our body compensates by producing more oil, and now we have a greasy scalp less than 24 hours after we washed our hair. At this point, we either have to wash our hair religiously every day to avoid the greasy scalp catastrophe, or we can buy another product designed to solve the problem the shampoo created: dry shampoo. Even if we opt out of buying the dry shampoo, we still end up washing our hair way too often, going through shampoo bottles way too quickly, and spending way too much money in the process. Not to mention potentially damaging our hair with all those chemicals and frequent washes!
[Editor’s note: Of course, everyone’s hair is different and has different maintenance needs. Do your research and consult a professional before making drastic changes to your hair care routine.]The benefits of using DIY hair products
The same is often true of any specialized products sold for hair. Products touting buzz words like “argan oil” or “coconut oil” can immediately mark up their price because the consumer has been conditioned to see those ingredients as natural and the overall products as less artificial. However, if we look at the actual ingredients of these products, the buzz words are almost never the first ingredient, and rarely make it into the first five (ingredients are listed in order of most concentration to the least concentration).
For instance, I once saw a 4 fl oz bottle of an OGX serum that cost $5.99 and advertised coconut oil and bamboo extract that actually had seven ingredients; coconut oil was the fourth listed, and bamboo extract was the sixth. The first three ingredients were two silicones and one alcohol, the fifth ingredient was another silicone, and the last ingredient was a fragrance. The amount of actual coconut oil and bamboo extract our hair absorbs from this would be minimal, and may even be negated by the damaging effects of the other artificial ingredients. I personally know I’d be better off buying a 14oz jar of pure coconut oil for $8, which will last 10 times as long as that specialized serum.
In order to break free of the advertising traps all around us, I had to shift my mindset. Many of us do not need a specialized product for every step in our hair care routine, and lots of us certainly don’t need products made in a lab. I’ve found everything I need for lustrous, voluminous hair in my kitchen. I have had amazing success in improving the quality of my hair with DIY hair products, and my routine has and will continue to save me hundreds of dollars per year. I only need three ingredients, all of which can be bought in bulk quantities, and budgeted by the year.
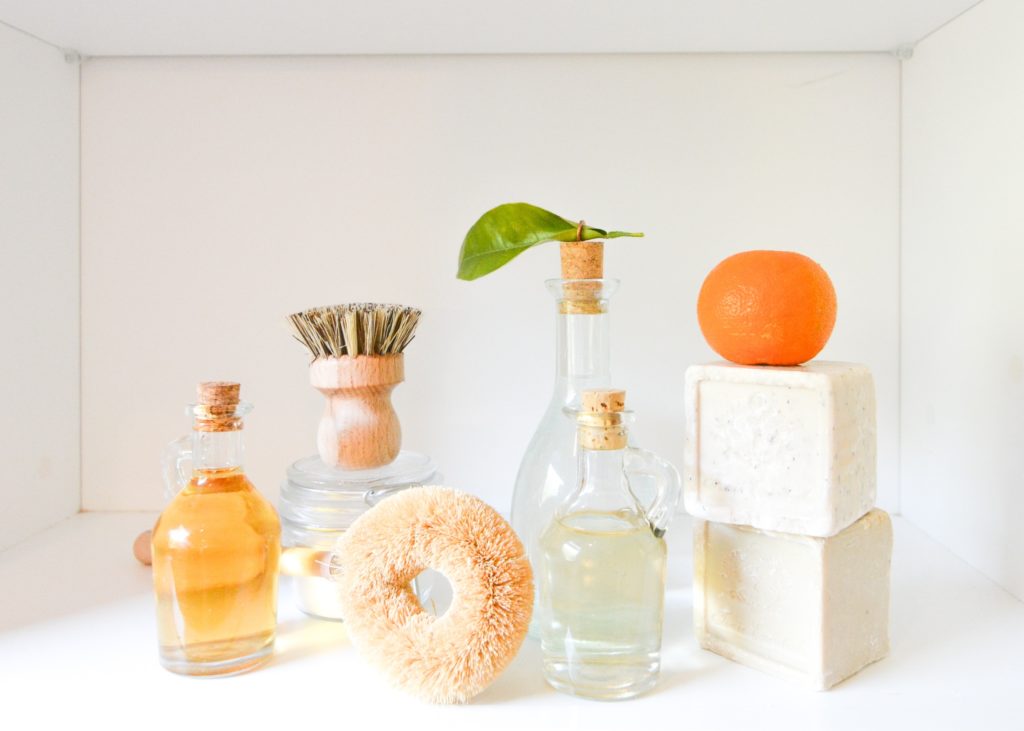
My 4 go-to DIY hair products, & how much they cost
1. Shampoo: no more than $1/year
Ingredients:
- 32 oz Glass Jar
- Baking Soda
- Water
I scoop 2-3 tbsp of baking soda into the jar and fill the rest up with water; if necessary, I add more baking soda to make sure that the water is saturated. Then, when I’m in the shower, I pour this mixture over my head, and then massage my scalp as if using a normal shampoo. A 32 oz jar full of saturated water should last me for two washes.
The cost of this recipe will depend on the cost of bulk baking soda in your area. I personally do not recommend buying Arm&Hammer brand, as it is not truly a bulk item. If you buy that brand, you are paying for the packaging as well as advertising, and it will likely be more expensive. My grocery store sells baking soda in bulk bins, and I bought about 19 lbs of baking soda at 24 cents/pound for a total of $4.39. If I just used baking soda for shampoo, that would be about 20 years’ worth of shampoo for under $5, but I also use baking soda for a lot of cleaning, so it made sense for me to buy that much. Usually, baking soda is less than $1/lb, so it shouldn’t cost more than $1/year if I go through about 1lb/year for hair.
2. Conditioner: $10 – $20/year
Ingredients:
- 32 oz Glass Jar
- 50% Apple Cider Vinegar
- 50% Water
To make this, I pour equal amounts of apple cider vinegar and water into a glass jar. I use this right after washing my hair by pouring the mixture over my head, massaging it into my scalp, and running my fingers from scalp to tip. A 32 oz jar usually lasts me three or four washes.
The cost of this recipe will also depend on the cost of ACV in your area. My grocery store sells huge 2-gallon jugs of ACV for $18.99. That will absolutely last me longer than a year. I would recommend looking for ACV in bigger quantities like that, as opposed to the small 16 oz quantities most grocery stores carry in the food aisles.
When I started using this recipe, I was truly amazed at how moisturized my hair was. When I used to use normal shampoo and conditioner, my hair would always be horribly tangled after showering even if I brushed it before I showered and used a ton of conditioner. It would also become easily tangled throughout the day. But now, when I pour the ACV mixture over my head, my hair immediately melts into a smooth cascading waterfall. My hair also never gets tangled throughout the day, even if I put it into a messy bun.
3. Serum: $13 – $30/ year
Ingredients:
- 100% pure organic cold-pressed Argan Oil OR 100% pure organic cold-pressed Jojoba Oil
After I wash my hair, I take a dime-sized amount of either of these oils and massage into the tips of my wet hair, then I work backward towards my scalp. I do not put oil in my hair on days that I don’t wash.
I included two options at two different price levels. The 2 oz Argan Oil option is from Whole Food’s 365 brand costs $9.99 and will last me four months. The 8 oz jojoba oil option from the 365 brand costs $12.99 and will last me for more than a year. An even thriftier option is to skip the ACV mixture, not condition your hair in the shower, and instead just use a little extra oil every time you wash your hair.
4. Sea Salt Spray: $10/year
Ingredients:
- Glass Spray Bottle
- Sea Salt
- Water
- Optional: essential oils
I mix the sea salt and water in the spray bottle, continuing to add salt until the water is saturated. You can add your preference of essential oils for fragrance. I spray this on wet or dry hair at any time to encourage volume and waves. The cost will depend on the cost of bulk sea salt in your area. A 4 oz spray bottle usually requires less than a tbsp of salt and will last three or four months depending on how often you use it.
Benefits For My Hair, Wallet, and Mental Health
Since starting this hair care routine, I only feel the need to wash my hair twice per week. I do shower every day, but on days that I don’t wash my hair, I simply massage water into my scalp, and this is sufficient enough to make my hair feel clean. I have a haircut that includes “baby bangs,” and I can say with confidence that even my bangs don’t get greasy. Reducing the frequency of washing my hair has enabled all of these recipes to last longer, and therefore it saves me money while improving the quality of my hair.
I have found that my hair has become more voluminous, shinier, wavier, and even darker since starting this routine. It even grows faster. I have naturally very dark brown and mildly wavy hair, and I’ve never dyed it. After about six months of this DIY routine, people kept asking me if I was dyeing my hair, because it now looked black. This happened so much that it kind of started to annoy me! I wasn’t dyeing my hair; it was all completely natural! My hair also became much wavier and started to grow at almost twice the rate it had before. Now it grows at a little less than half an inch per month. This would be a problem for my baby bangs, but fortunately, I go to an Aveda Salon, so I get free bang trims every three weeks.
The least expensive version of this DIY routine costs no more than $15/year. The most expensive version costs about $60/year. This routine won’t magically change your hair from blond to black, or straight to curl goddess, but I’ve found that it helps enhance my natural traits. This routine saves me hundreds of dollars per year, and I am very grateful to have that money freed up for more meaningful uses. The most valuable thing this routine gives me, however, is freedom from the cycle of self-hatred upon which those beauty advertisements depend.
Emma Schwarz is a classically trained cellist and passionate chamber musician from Boise, Idaho. She holds a Bachelor of Music in Cello Performance from the Lamont School of Music as a student of internationally acclaimed cellist Matthew Zalkind. Emma is also trained through all 10 books of the Suzuki Method and has accepted an offer to return to the Lamont School of Music for a Graduate Certificate in Suzuki Pedagogy in the fall of 2019. Emma maintains a private studio in Denver; she is also a cello teacher at West Denver Suzuki Strings, City Strings, and cello faculty at the Boulder Valley Waldorf School.
Image via Unsplash
Like this story? Follow The Financial Diet on Facebook, Instagram, and Twitter for daily tips and inspiration, and sign up for our email newsletter here.