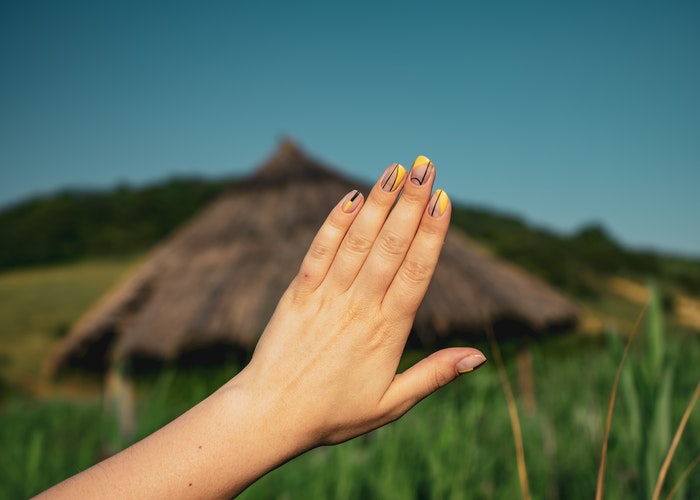
5 Tricks Anyone Can Use To Upgrade An At-Home Manicure
With social distancing in full effect, many of the luxuries we enjoy have become limited, and the nail salon is one of them.
Since high school — whether it’s for a birthday, before a vacation, or just when I needed a pick-me-up — going to the salon for a picture-perfect manicure was the ultimate treat. While some of my friends and colleagues would hit up the salon regularly, I left it for special occasions. Despite my lack of frequency, I hated having chipped nails, so learning to do my own was of the utmost importance. It turns out, there are plenty of ways to do your own salon-worthy manicure or pedicure. From buffing to painting, press-ons to powder, I’ve done them all from the comfort of my couch.
Whether it’s for a virtual wedding, a formal home date night, or just a personal treat, here are a few of my favorite ways to get awesome nails. We know your nails will thank you in no time. Of course, the first step for all of these at-home techniques is to prep your nails.
Items needed for prep:
Play some music or put on a movie, have a glass of wine or a cup of coffee and take your time! First, use nail polish remover to get rid of any old polish and dirt or residue. Cut, shape, and buff your nails to get them ready for the polish or adhesive. Use a hand exfoliant to remove any additional dead skin, then wash off all the dust and product. Place a drop of oil on each cuticle and slather your hands, fingers, and arms with lotion, massaging the fleshy areas of your thumbs. Finally, use nail polish remover one final time over each nail to remove lotion and oil residue and you’re all set to test out the following tips and trends.
1. Glass Nail Buffing
Looking for a cheap, long-lasting way to make your natural nails look nice? A glass nail buffer is a great solution. If you’re not familiar, glass nail buffers can make your nails super shiny, making it look like you have on a coat of clear polish.
These gorgeous beauty tools reign supreme over traditional buffers because not only do they hardly ever wear down and are simple to clean (just run it under a little soap and water), but they work great on both natural and acrylic nails. Plus, they seal the keratin layers at the edge of the nails together which helps minimize chipping as opposed to traditional files. This cost-efficient (it’ll run you about $5), easy-to-use tool makes your natural nails look shiny and radiant. With a few quick swipes of different sides of the buffer, you’ll end up with mani-caliber nails without the cost, mess, or hassle — it’s really that simple.
2. A Fool-Proof Painting Technique
Throughout middle school, I was the person friends would come to when they wanted their nails painted. Many years later, I still have a vast collection of liquid polish that I swipe on my nails at least once a week. The secret to a great paint job? Patience, practice, and thin coats. After applying a base coat and letting it dry completely (lightly tap your nails together. If they feel tacky at all, they’re not dry), you’ll add your color.
Apply the polish from the middle of your nail to the tip to get a little extra color to the parts most likely to chip. After that dries, apply a layer from the cuticle down, starting with a sweep from the middle, then on each side. Repeat that step after the first layer dries. Finally, once your nails are dry and you’re content with the vibrancy of the color, apply the topcoat and let them dry completely.
Pro tip: In a rush for your nails to dry? Drunk them in ice water or spray cooking spray on each nail to speed up the process!
3. Press-On Nails
Once upon a time, I was the queen of press-on nails. While my tastes have changed, I still have a soft spot for this simple and affordable way to get envy-inducing nails. If you’re yearning for longer nails, this is the easiest and fastest way to get both length and color.
Since this method has been around for a long time, there are plenty of options. All you do is prep your nails, select the size that fits each finger, apply the glue, stick them on, and you’re done. The learning curve is super simple, and since each pack comes with extra nails, you have replacements for when some inevitably come off. Sure, they’ll only last you a week or so, but for a special event (like a Zoom wedding or date night-in), this is a suburb solution to salon-looking nails at a fraction of the cost.
These will run you just under twenty bucks, and I suggest this set from VM Direct Nails or this one from Kiss, and this one from Milanco is also good.
4. Powder Dip Manicures
The first time I got a powder dip manicure, my life was changed. The simplicity, the longevity — it was revolutionary. As someone who has been Team Gel since college, I was hesitant when a friend first suggested the method, but after trying it, I was in love.
Here’s how it works. After prepping your nails as you normally would, apply a bond or base coat, and let that dry. Once it has, you’ll alternate applying a base onto the nail and then dipping it in a loose, colored powder. Do this to each nail a few times until you reach the desired color. Once that’s complete (and after brushing off any extra powder residue on your hands), utilize the activator to harden the powder. Finally, you’ll seal it all with a top coat and you’ve got long-lasting powder-dipped nails.
My bachelorette, bridal shower, and wedding nails were all powder-dipped and they lasted well beyond a month. While they look great and last ages, the learning curve on how to do them takes time and patience (as well as a little more money) but once you get the method down, it’s worth it.
Again, it takes a little practice (and costs just over twenty bucks) but once you get the hang of it, you’ll have no problem saving your hard-earned money and getting a flawless manicure from home, even after social distancing is over.
5. Gel Polish
While it takes a little more time, money, and practice, gel polish is the mecca of at-home manis. Not only does this manicure last for ages, but once you get the hang of it, you can also do it yourself at home.
After prepping your nails, you’ll alternate between applying the gel polish (here’s one I recommend) and curing your nails for 30 seconds under a UV light (which often comes with the polish). Repeat this until you’re happy with the coverage. After your nails are at the saturation you prefer, you add the top coat and cure it for 30 more seconds. If you have any sticky residue on your nails, swipe them with a cotton ball drenched in rubbing alcohol and add a little cuticle oil for good measure. Gel polish will cost you a bit more (at about $30 a bottle), but the results will last for weeks.
With a little bit of practice and perseverance, you’ll officially be on your way to DIY Instagram-worthy nails. Whether you just buff them out or become a gel-applying pro, having a great manicure technique is the ultimate tool for when you need a cheap and at-home pick-me-up or are looking to add a little pampering to your day.
Rachel Varina is a social media, digital marketing, and editorial expert living in sunny Tampa, Florida. When she’s not creating content or collaborating with brands, you can catch her devouring thriller novels and supporting pineapple in the great pizza debate with her husband and two rescue pups by her side. You can find her on Twitter and Instagram.
Image via Pexels
Like this story? Follow The Financial Diet on Facebook, Instagram, and Twitter for daily tips and inspiration, and sign up for our email newsletter here.