8 Tips I Used To Put Together A Cozy & Livable Guest Room On A Tiny Budget

A little under four years ago, my husband and I hit the Toronto jackpot. We found a reasonably priced apartment in a walkable, sociable neighborhood, and it had something we’d long viewed as a luxury: a second bedroom.
Anyone who lives in a city with a runaway real estate market knows how lucky one can be to come across something with a second bedroom. Naturally, we jumped on it. We’re both professionals who have hobbies that require a lot of quiet and concentration (I love writing, of course, and my husband works on model trains). We envisioned a pristine office in which we could get work done and chill out when we needed space from one another, and maybe one day add a sofa bed so our friends could crash whenever they liked. In the list of big “adulting” achievements, this was definitely one of them!
But then, for almost two years, nothing really happened. For the first six months there, it served as a floater space for all the extra stuff we’d yet to find a place for (it was our first time living together, so we still had a ton of extra stuff we needed to, but couldn’t, part with). We never got around to adding a desk, and we had naively thought we would just conveniently come into a secondhand futon like we had during our student days. The room served a few weird purposes over those first couple years — oversized closet, laundry drying room, a temporary bedroom for our friend that moved in with us for three months, a hiding place for our cat. We’d talk and talk about what we would do with it when we had the time, but it was getting ridiculous. The longer I went without doing anything with it, the more I just got Instagram envy and my dream guest room seemed more and more unattainable.
Finally, once we’d cleared most of the boxes and our friend’s leftover stuff out, I set a goal: make one update to the space, big or small, per month. I didn’t have an end look in mind, and I consciously told myself to not get hung up on the end look (which would undoubtedly result in inflexibility on my part). The first thing I did was put up a couple of picture ledges and take some of my vinyl out of storage and display. Then came a curtain rod and a set of curtains. Some months the update would be big (like when we painted a dark blue accent wall), whereas sometimes they were small (like getting pictures printed and finding a place on the wall). Taking this approach and allowing myself to be a bit scattered helped me build a space that I actually knew was comfortable for me, not just aspirational — and it helped me never spend money I wasn’t comfortable spending.
Here are a few of the things I’d recommend for building the perfect second bedroom/office space without overwhelming your budget:
1. Get IRL inspiration
One if the most common pieces of decor advice young amateurs like myself are often given is to go to Instagram, make Pinboards, and essentially curate an online scrapbook of what you’re inspired by. But the years I spent doing this didn’t really yield much in terms of productivity, even if it was fun. This isn’t really an attempt to shit on Instagram culture (heaven knows I do that enough), but I found I actually felt more motivated to actually take action on my second bedroom when I was in cool places in person, not just staring at a screen. This wasn’t even in other people’s spaces, but in inherently social business and community spaces (most of my second bedroom was inspired by my neighborhood bar, a diner up in my hometown, even a tattoo artist’s studio). The reason I prefer this method is that you actually get to see a space in the context in which it will be occupied — imperfect, people moving around in it, maybe a small mess or clutter here and there. If you are constantly looking at rooms that are curated to be gorgeous and almost for the sole purpose of being photographed, the intimidation of trying to create something as perfect will impede your journey.
2. Framing every random thing you can think of actually makes for a very chic gallery wall.
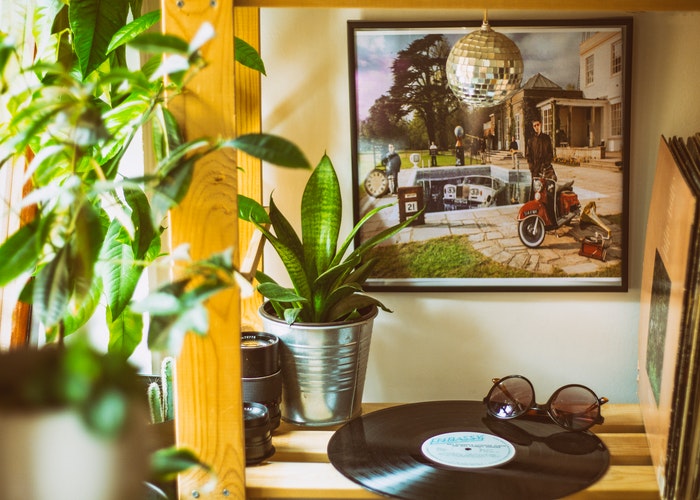
I’ll admit I’m one of those people who likes to wear her quirks on her sleeve, so my immediate thought when looking at my accent wall was “how can I make this reflect myself?” instead of “how can I make the perfect gallery wall?” Most of the items I have framed on that wall were cheap or free. Among them are an old, Cold War-era advertisement poster I got from work (I work for an advertising trade magazine), an ancient issue of the magazine I work for (from 1928!), two of my favorite records (one of which was a hand-me-down from my Dad), some prints my friend made, a postcard from a restaurant in Chicago my husband and I dined at a few years ago, and two Etsy creations dedicated to podcasts and movie quotes I like (both of which were $10). Elsewhere in my room, I also have framed a funny greeting card I got once, the license plate from my first car, and a carefully-peeled label from my hometown’s local brewery. None of these were pricey, and there are some that I’m actually not super in love with aesthetically, but when I put them up as space fillers, I was satisfied with how they blended into the space.
Frames can actually end up being costly, and it can seem like a drag to have all your frames look the same when you’re going for that quirky, vintage gallery style. I committed to a mix — I took big bags with me on every neighborhood walk to scoop up potential frames from sidewalk sales and cheap antique and thrift stores, but for what I couldn’t find, I sought a few IKEA frames (including small ones for $2). These frames might not be as funky and vintage, but they disappear into a gallery wall, and trust me, too many frames makes your wall into an overwhelming picture salad.
3. Mix practical with personal.
These two wire wall organizers from Amazon were originally for my office at work, but they turned into a great desk saver for my second bedroom that could add some personal flair. The grid-like structure makes it easy for even not-so-visually oriented people to create something uncluttered and cool-looking, even if you’re mixing personal memos and curated decor. My boards have a mix of small posters (like a simple, hand-drawn one from Chickpea Mag), personal mementos like my friend’s poetry book and Polaroid photos, and actual things I need, like my weekly meal plan and receipts I have to keep. One went directly up on my wall, but I wasn’t able to put nails in my other wall, and it turns out these racks look just as good balanced on a desk against a wall.
4. Go simple and elegant with your hardware.
My room is small-ish, so when it came to anything structural, I wanted stuff that blended into the room and helped it feel tall and bright. I find smaller, sleeker designs and neutrals help rooms look larger without drawing too much attention to themselves. For my window, I spent only $40 CAD for this simple black resistance rod and pack of white curtains (these obviously won’t keep a ton of light out, which is fine in the morning for my south-facing window, but if you need to keep light out desperately, consider something you can pull down). I also added in a couple of shelves for storage and display purposes; one was a $10 shelf-and-bracket combo from a local hardware store, and I also added a set of IKEA Mosslanda shelves.
5. Dried flowers are a cool aesthetic compromise.
It took until my mid-20s for me to realize how much I love fresh flowers, and I did always see myself as someone who kept a fresh bouquet of flowers in a key room. And you can find inexpensive flowers in local shops and bodegas, but it still ultimately adds up, creates a bit of a mess, and can feel a bit futile at times (especially when it’s been a while since you’ve had a guest). I recently found an independent bridal retailer that also creates dried bouquets for $10 to $15. It seems a tad bizarre, but these flowers have added some sweet brightness to my room without the tacky plastic feel of fake flowers. They’re very obviously dried, but it adds to the vintage flair without being aggressively twee. Now, how’s that for flowers you only have to buy once?
6. Barter for the big-ticket items.
I have mixed emotions about platforms like Bunz — I tend to hate using it for everyday items like clothing and accessories. But admittedly, the two largest items in my guest room (my desk and my futon) came from Bunz. Bunz is rapidly expanding into the U.S. and is loved by many. I didn’t go actively looking for my furniture on the app, but when I did come across it while browsing, I followed similar rules to that which I follow when trading for clothes off Bunz: I won’t take anything where the actual item isn’t shown (read: they’re showing me the catalogue/online photo instead), and I steer clear of vague language like “needs some TLC” or “just one small stain” (translation: more like two larger stains). The desk was a steal because its dimensions are not really standard for desks (it’s a little more square than rectangular). I traded it for my old longboard, which was $150 more than a decade prior, and I ended up throwing on a coat of paint with the remaining stuff from my work on my walls.
In the case of my futon, I knew I was taking a chance (I can’t blame anyone for not wanting to go secondhand on a futon or sofa bed), but I was able to see it in person beforehand, which made a huge difference. I was able to confirm that the trader was getting rid of it because she was moving, not because it was secretly damaged somehow, and I was able to actually inspect it for stains, rips and mystery lumps. Bunz doesn’t allow cash trading (although it does have a cryptosystem), but this girl was happy to take a $100 gift card in exchange. Give yourself time for these kinds of things. Don’t go “shopping” for them on platforms like Bunz and Craigslist. Set yourself a date pretty far in the future (I gave myself one year). If you haven’t found an ideal, non-compromising item by this date, then go shop for a new one. Cruise platforms like Bunz and Craigslist and local trade groups every day, but remind yourself that you don’t have to rush to get one that’s “just good enough” and end up really unhappy.
7. Dress up cheap bedding.
Look, I’m not about to put my guests in burlap, nor am I advocating for you to do so. But I do believe it is easy to get carried away with guest bedding; if you don’t have a ton of money to be spending on it, don’t worry about your guest judging you because you don’t have top-of-the-line stuff. I just advocate for going for your own/older stuff when you can, but if you have to buy something new, the cheap-and-cheerful IKEA Grusblad has actually been very well-reviewed by our guests. We went equally thrifty on the Tradastar duvet cover and pillowcase set and two Hampdan pillows. That’s $57.96 CAD for a fully dressed queen-sized bed (using sheets we already had). It looks pretty sharp already, but we dressed it up with a few throw pillows (two were $10 each off of Amazon, one was a gift from my boss and the other was one of those “who knows where this came from?” affairs) and a cheap throw blanket from H&M Home that we already had lying around. The presentation of a bed can make it look a lot more homey and lived-in than any high-end bedding ever will. If you don’t have a ton of throw pillows to toss around, you can add something like an old sentimental stuffed animal to create some volume at the head of the bed.
8. Don’t hide your personal stuff, just mix it in.
I grew up moving a lot, and eventually, real estate agents asked us to start “staging” our house, putting away every personal family picture and replacing them with motel art, hiding things like yoga mats and my school books and old magazine issues. When I went through an obnoxious minimalist phase a few years ago, I became a little depressed when I realized that I’d accidentally replicated the sad, impersonal house I used to live in when I was younger, when I was stressed about stuffing my books into closets. While you don’t want a guest room to become a glorified closet, I actually think it’s really healthy and helps it feel homey to have a few of your things strategically stored in there, even if they’re visible. When I installed my shelf and brackets and it ended up having a lot more space than I realized, instead of going out and spending $60 on a succulent terrarium, I moved my yoga block and my bottle of room spray onto it.
Bree Rody-Mantha is a full-time business journalist and part-time dance teacher based in Toronto. She covered Toronto City Hall during the Rob Ford era before transitioning to business journalism. Her areas of specialty include the influencer market, advertising, media buying, and technology. Follow her on Twitter.
Image via Unsplash
Like this story? Follow The Financial Diet on Facebook, Instagram, and Twitter for daily tips and inspiration, and sign up for our email newsletter here.


